Thank you! Your submission has been received!
Oops! Something went wrong while submitting the form.
MENU

Announcing a new research report, made for creators like you.
Understanding your audience, fans, and customers is key as a creator. As we close out our third Creator Month at Teachable, we’re pleased to release our brand new consumer report, Creator Connections.
With this inaugural report, we set out to reveal the ins and outs, trends, and behaviors shaping fans and their favorite creators. The report, based on a survey of 1,000 U.S. consumers, tackles everything from the nitty gritty of what goes into creating winning content to the anatomy of developing authentic fan-creator connections.
{{guidecreatoreconomy-component="/blog-shortcodes/blog-popup"}}
“It takes a highly engaged community—of fans, followers, students, subscribers, you name it—for creators to achieve long-term, sustainable growth. And that growth is the north star for even the biggest and best creators out there,” says Mark Haseltine, Teachable CEO.
“With this report, we set out to understand the trends shaping the people who are logging on, tuning in, and religiously following creators of all kinds. We hope these new insights help not just our Teachable creators, but creators across the industry who are looking to find new and better ways to deliver content, products, and experiences that make an impact—in the here and now, and for some time to come.”

{{guidecreatoreconomy-component="/blog-shortcodes/blog-popup"}}
Dive deep into the trends shaping those logging on, tuning in, and religiously following creators—of all kinds. Plus, unlock insights about how creators can remain trend-savvy, without compromising audience trust or brand authenticity.

In celebration of Creator Month 2023, we’ve hosted a series of live events on YouTube with real Teachable creators. These fireside-chat-style events provided a deep dive into what it means to create impact on your students and customers. We’ve tapped creators of every size and industry to share their stories in our special event series, Creator Month 2023: Creating Impact.
Check out our live chat with Ashley Turner. Ashley and her family moved to a few acres of land on the coast of Nova Scotia in 2017 with an interest of being self sustainable. Today, Ashley and her family now operate on over 300 acres of vast wood and pasture land, with a growing operation of premium cattle. (Learn more about Turner Farm here!) And, during the pandemic Ash started teaching live sourdough classes to a worldwide audience.
Want more stories like this? Be sure to watch our conversations Mary Van Geffen, Shauna Thoresen, and David A Smith MBE on our YouTube.
{{coursecurriculum-component="/blog-shortcodes/blog-popup"}}
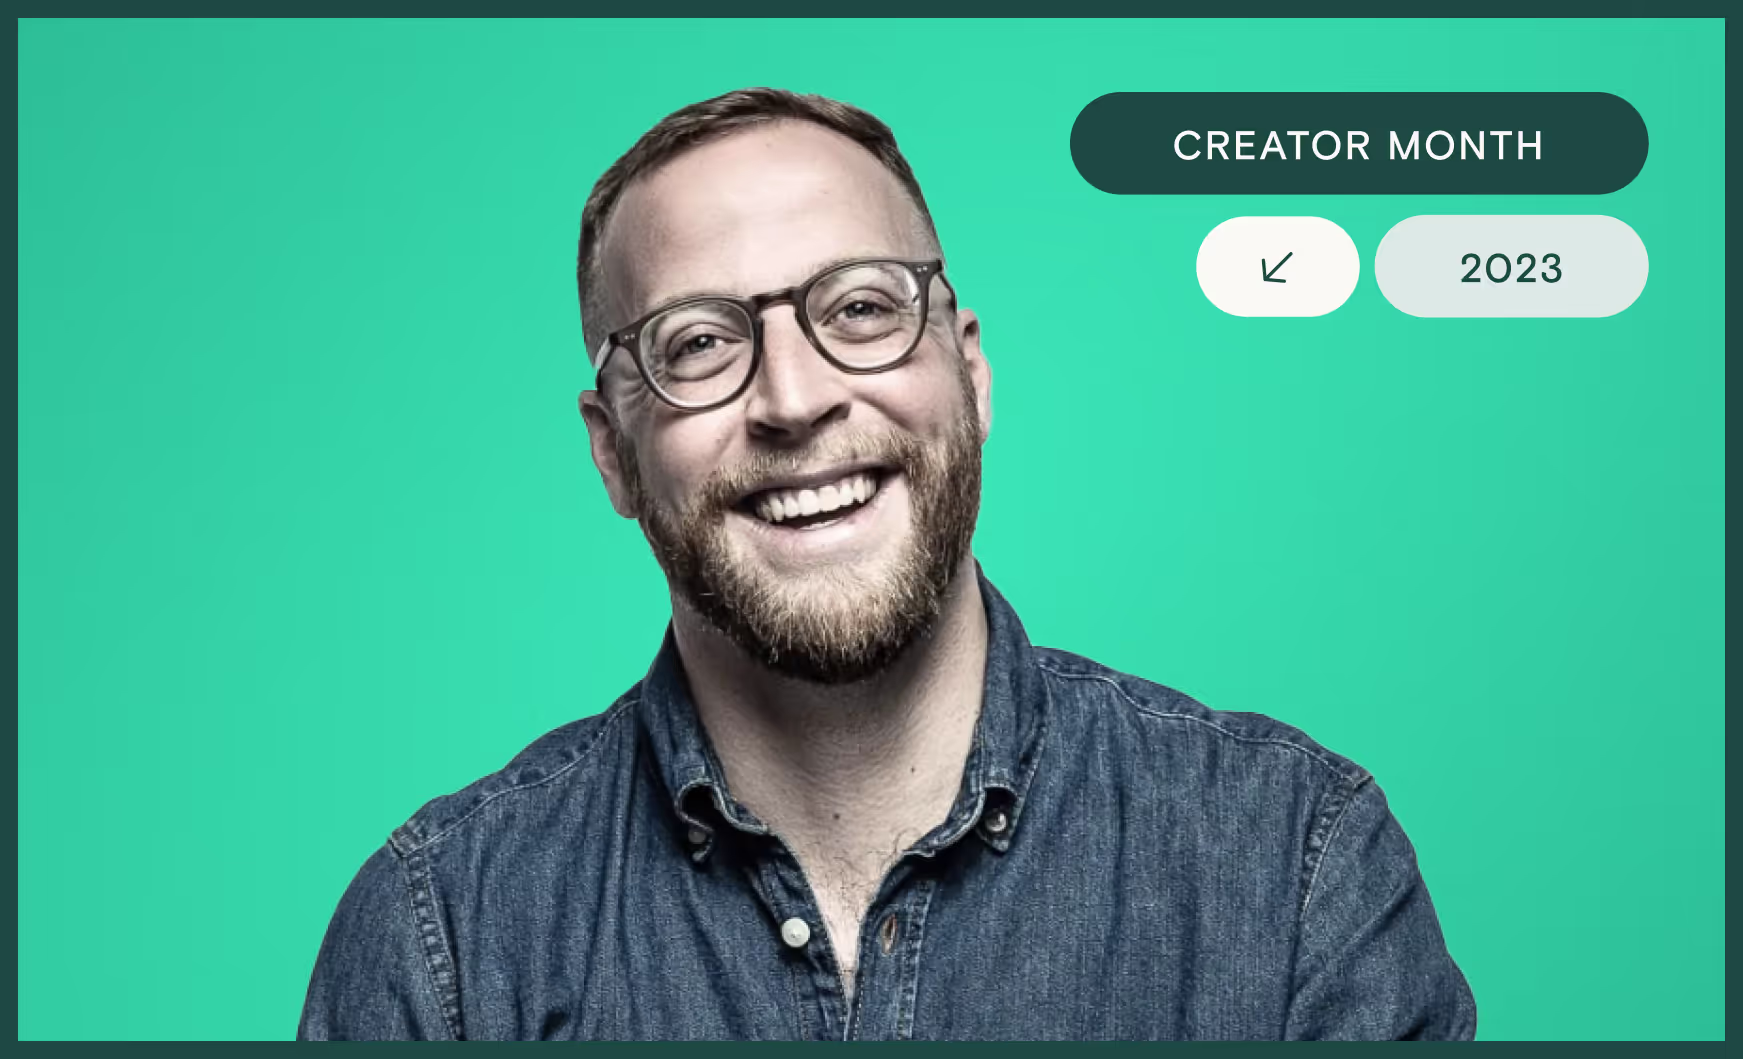
We’re sharing the story of Jay Clouse, a multi-faceted creator who is in the game of helping people become professional creators. As a podcaster, newsletter writer, and course creator, Jay embodies the word “impact.” Everyday his content reaches those looking to create and make an impact of their own.
Today, he is the founder of Creative Companion and host of Creative Elements, a narrative-interview podcast exploring how today’s top creators make a living with their art and creativity. He previously led the Community Experience team for Pat Flynn and Smart Passive Income, designing their paid membership community and cohort-based course programs.
Teachable’s very own Jonah sat down with Jay to learn about the power of building a community for thriving students. Watch the full video and see our summary of the interview below.
As a professional creator with a podcast, newsletter, and course creation business, Jay knows how to build a successful community for his students. His story goes back to 2017, when he started building a membership product in 2017. This led to creating courses with LinkedIn Learning in 2018 before eventually bringing his courses to Teachable.
His experience with coaching and group coaching helped him structure his courses independently and showed the value of the transformation he could offer—all before creating his first course.
Jay shares that he was able to offer coaching services to creative freelancers, leveraging their expertise in business and content creation. Eventually, he was able to create three courses.
“I actually developed three courses all at once, which I wouldn’t recommend doing,” Jay says. “It’s all combined into one course on Teachable actually, I call it the Freelancing Masterclass. But originally, I developed it as three separate courses: Business for Freelancers, Selling for Freelancers, and Marketing for Freelancers, because I saw them as three different activities.”
Jay explains it was a 48-video, 48-lesson mega course broken into three courses. While he was able to put out great content, Jay notes it was a lot of work to develop three courses and release them simultaneously.
“I was really developing for a long time,” he says. “And I wasn’t getting market feedback as much as I should have along the way. So it wasn’t my most successful launch. By any stretch, it was actually my least successful launch!”
However, by refining the courses and changing the launch strategy, Jay was able to improve sales and make these courses an evergreen offering.
“If you think back to 2017, online community wasn’t a thing,” recalls Jay. “In 2017, as I was doing this group coaching exercises, I just recognized that if we’re meeting once a week, there are things I want to say to them and things that they probably want to share with each other between those seven days. And so I needed a way for them to communicate.”
This led Jay to create a private Slack channel for his students. He explains people were getting more value out of continuing to build relationships with their group members.
Today, Jay believes that creating a private membership community as a separate product can be a good option for course creators who want to provide additional support to their students.
Takeaway: Offering a separate paid membership community for students who have purchased a course can provide a higher priced product and allow creators to support students better. It’s also a great way to fuel sales.
A membership can be a good starting point for creators without a full curriculum, as it allows them to showcase their expertise and build a following.
As far as a community, clear purpose and onboarding experience are crucial for community success. What’s more, a community reduces the pressure to create perfect content and allows for unpolished access to the creator. Once a creator has shown value through a community or membership, Jay suggests that a lightweight cohort-based course (think: group coaching with curriculum) could be the next step before creating a pre-recorded course.
Takeaway: Show up, offer value, and be real to build a thriving community.
Your business is your business—always has been and always will be. We get that. At Teachable, we’re in the business of helping yours run as smoothly as possible so you can get back to doing what you do best and focus on who matters the most to you, your students.
This year, we’ve already given you options to make your business run that much better: our AI hub to help spark creativity, our App Hub to integrate your favorite applications and tools, and now, we’re pleased to add another tool to your ever-growing toolkit—Memberships.
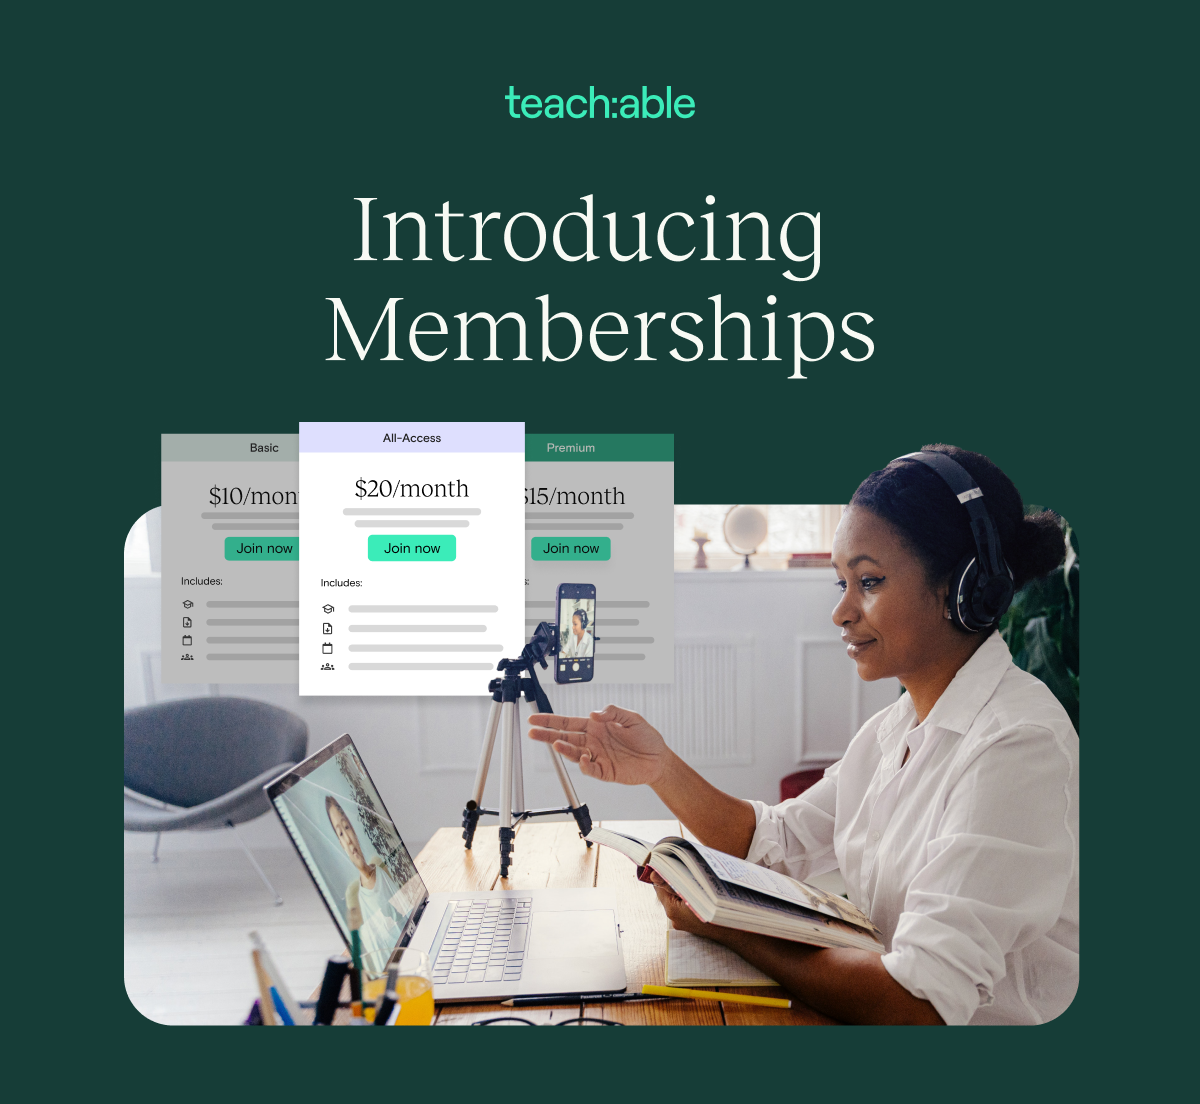
Why Memberships? Hint: it’s like putting revenue on repeat

With Memberships, creators can now build a recurring revenue model that centers around gating product access by tiers. Creators can customize the student experience of each tier, and students can upgrade and downgrade between tiers all from their own accounts.
Flexibility matters. And that’s why we’re putting control back in your hands, and giving your students the same power too.
A membership product offers you the ability to group courses, coaching, and/or digital download products together any way you want. From there, you can adjust the level of access to your products based on a student’s tiered plan. Each tier can be individually customized by price and content. Set monthly or annual pricing, or add a free trial; it’s up to you.
What’s more, Memberships allow you to adopt a business model that’s sustainable, profitable, and that much more engaging for students.
You work hard to develop a relationship with your audience—through social media, emails, courses, coaching, and more. Now you can monetize all that you do for your students in an even more powerful way.
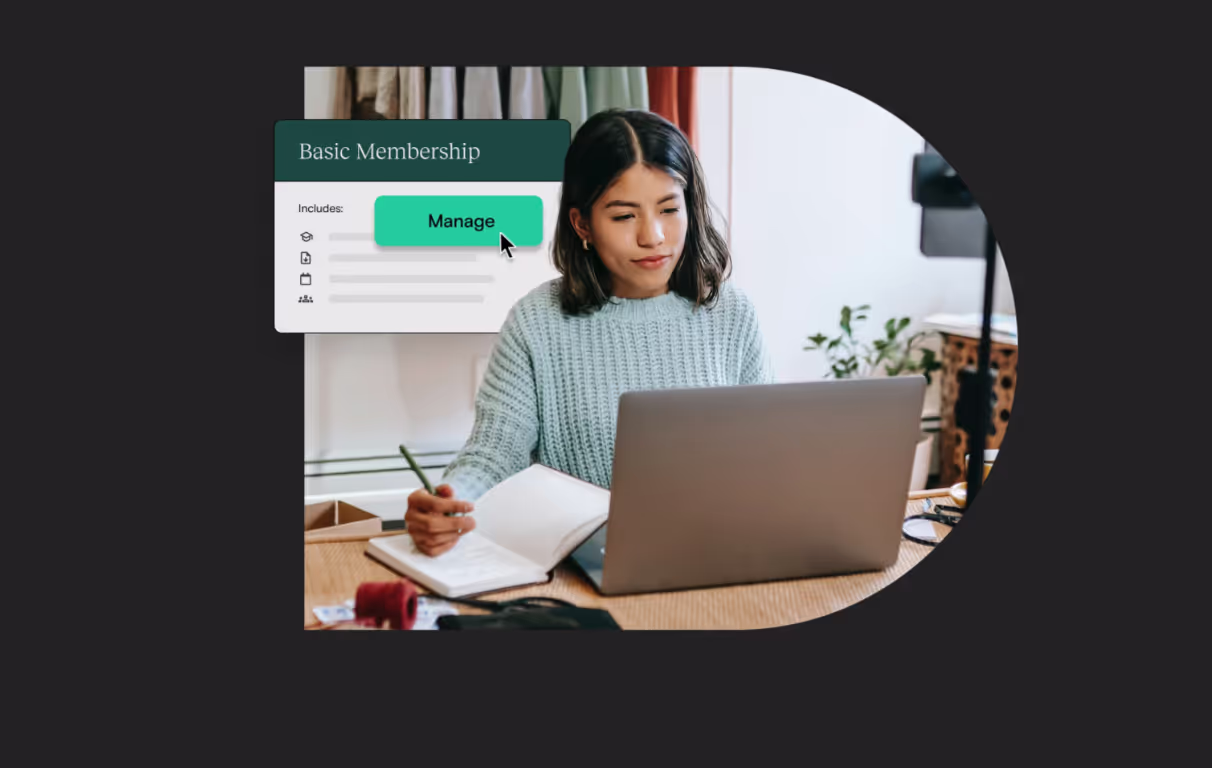
Giving your students a membership experience that’s as easy for you to manage as it is for them to access and control.
Memberships also allow students total control over how they learn and spend money with you. Students now can manage their upgrades, downgrades, and cancellations all on their own. From the My Memberships page in their account, your students will be able to take control of their own learning experience.

Plus, offering a membership product lets you release exclusive content over time. Build the experience you want and provide product options for your audience that works best for them. Release audiobook chapters, podcast episodes, new downloads, or even courses as you see fit.
Like we said, it’s your business, your way.
We don’t have to tell you how you show up for your students matters. But, this goes beyond continuous engagement. Consider the lifetime value (LTV) of a student as part of the full student story.
With Memberships, you can tackle both of those, engagement and LTV, directly. In fact, creators who sell content through a recurring subscription model such as Memberships have a 43% higher lifetime value.
Put more plainly: An increase in student LTV directly translates to an increase in payments revenue for creators. Consider this a win-win scenario. Your students have options that work for them, and you generate more revenue.
We’ve heard time and time again that creators crave this feature, so we’re pleased to offer our Membership feature to those on all paid plans on Teachable. Basic members are limited to one tier and 500 members, whereas Pro and higher can have unlimited members and unlimited tiers.
If you’re on a paid plan at Teachable, you can take advantage of the Membership product immediately in just a few steps. We’ll walk you through it below.
To create a membership tier:
You can add additional tiers to your membership to offer additional levels of access to products and services by navigating to the Membership page and clicking Create a new tier. Available to those on the Pro plan and up.
Need to make edits? That’s even easier. Update, add, or edit tiers, as well as change the name, imagery, and sales page of your Membership product. The Membership Dashboard displays your total revenue, total number of active members, and the average revenue per member across all tiers, so be sure to familiarize yourself with this hub. Review our Help Center to get all this info and more.
{{memberships-component="/blog-shortcodes/blog-cta"}}

You have the idea and the skills, now you need a course outline. When it comes time to building your course on Teachable, we’ve made sure to create a platform that can handle all of the heavy lifting so you can focus on the creativity part. But before you even jump into how to create an online course, we want to let you in on a powerful secret step that can save you a lot of time and help make your course creation process even better: outlining. Learning how to outline your online course will help you stay organized and know exactly what you’ll need when it comes time to get those creative juices flowing. Whether your niche is reading tarot cards or you’re working on a management course, having a course outline will ensure the creation process is structured, smooth, and organized. Your students will thank you, too!
But first, let’s take a step back to make sure you have all the information you need to outline your Teachable course like a pro.
A course outline contains the building blocks of your online course. It might also be called a class outline or training course outline. It breaks the topic and subject matter down into sections or modules, which can be determined by considering milestones, or learning objectives, you intend for students to have. Modules will be further broken down into specific lessons and learning activities.
Course outlines will include the overall learning objectives, so that the intended outcome is crystal clear for both you and your students. It’s essentially the roadmap for what you’re teaching and how you’re teaching it, as well as what practice/activities students will do in order to best learn what you’re sharing. It will also include any plans for “quizzes” with which students can self-assess where there might be learning gaps or to focus on material they might not have fully grasped the first time.
In order for your students to gain the most value from taking your course, it’s imperative that your course outline covers the following:
Yep, that’s right. To make a great course, think of the end result of your course before anything else. What’s the overarching goal or transformation that your course provides? Then work backwards to determine, step by step, how your ideal student would get to that end goal you’re selling. It’s essential to get clear on this before designing any lesson plans!

Take a few minutes to actually write down the transformation students will experience in your course. Go on, finish this sentence: “By the end of this course, students will be able to do blank.”
If your transformation is either too vast or too vague (e.g. how to live your best life vs. how to feel confident when meeting new people at a conference) you will find your outline may be difficult to craft. Instead think smaller and more specific. In fact, the more specific your outcome is, the better.
{{coursecurriculum-component="/blog-shortcodes/blog-popup"}}

It’s best to choose more actionable words than “understand” when you’re describing your transformation. Consider create, write, make, speak, design, etc. Outcome-based training is the most important thing for being able to outline your online course—and also for your students to comfortably progress through their learning. This will also help you identify if your course is best suited as a standalone course, a subscription, a mini course, or even a course with coaching options.
Now that you have the umbrella of the overarching goal open, it’s time to get more specific by looking at the modules/sections that are underneath it. While you’re determining this, keep a time frame in mind. Many creators will split the modules within a certain number of weeks or days to help students pace their learning. If you want your course to be five weeks long, then determine the most important five subtopics that need to be covered, and each of these becomes a module.
Alternatively, you can also decide what the most important subtopics are and then base the time frame off of that.
Once you’ve determined the modules, go ahead and decide what is most important for students to learn in each one. Learning objectives usually start with “Students will be able to…” and then include some kind of action word, followed by the task or skill. Remember to get specific with the action words, ideally avoiding the words “understand” and “know” for more concise words that are measurable, outcome based, and taught in the course material.. (For example, how do you measure if someone understands something? That’s a lot more nuanced and subjective than measuring if someone is able to create a podcast or design a website.)
Use the formula below to quickly make learning objectives that are highly effective and measurable:
Students will be able to + [insert specific verb] + [description of end product or demonstration of knowledge]
Students will be able to produce a podcast episode.
Students will be able to write a completed screenplay.
Students will be able to author a book proposal with two sample chapters.
Students will be able to construct a gardening plan.
Examples of strong verbs to use: create, produce, write, design, develop, assemble, collaborate, invent, construct, build, blog, devise, podcast, manage, facilitate, generate
Now that you have the course broken down into modules, it’s time to sort through the material you want to include. Ideally, each module will include the learning objective, some type of content where the material is being taught (keep reading for the five basic content types!), and “homework” of some kind. This is really just a chance for students to practice and implement whatever skill is being taught in this module—it doesn’t have to be very long, but rather to provide a chance for students to move from passively taking in information to actively getting involved with what you’re teaching. Invite them to try their hand at whatever it is being taught, because the more action and practice that they’re taking, the faster and more thoroughly they’ll learn!
The style of your course is up to you, and the method of content delivery you think will make the most sense for your subject matter and students may differ from course to course—even section by section or lesson by lesson. There are five basic content types that are most often found on Teachable creators’ courses: text and photo, PDFs and downloadables, slide decks, screen recordings, and video. Since people have different learning styles, incorporating a combination of content types will enhance student learning. We break them down to help you better understand which might be ideal for your course.

Some lessons may need just one content type, like a screencast, but others may need two, like a video with a companion PDF workbook. It’s perfectly fine—and encouraged—to use a variety of methods within your course.
Including these elements in your course is a potent way to ensure that students are really getting the most from the material you’re providing. Keep in mind, the assessments can be simple, and you certainly don’t have to grade them! You can use questions that align with the learning objective to assess. For example, if the learning objective is “Students will be able to utilize Podcastle to edit a podcast”, then the assessment or homework would be to familiarize themselves with the platform and to edit a podcast episode! Pretty straightforward, right? Although uncomplicated, this is an effective way for students to implement and check their own learning.
It’s a proven pedagogical theory that reflection on the learning process actually helps to deepen understanding of the material and help it stick. Some weeks the homework could simply be to reflect on what they learned or what areas they found challenging or the most interesting from that module.
Along the same lines as number five, having a pre and post assessment is a great way for students to track their learning, and it can also give you helpful feedback about your course. Including a few questions that align with the learning objectives in your course are a good measure of the learning that’s taken place. These can be collected on a survey (like Typeform or Google survey) for ease of feedback and also a way to collect testimonials!
What do you know about producing a podcast?
How confident are you with editing and publishing individual podcast episodes?
We believe in the art of simplicity, so we’ll do anything we can to help make your road to course creation a simple one. In fact, we’ve built our entire online course platform to do just this.
So, once you’ve learned how to outline your online course and have pumped out some content, you can easily use Teachable to physically create your course. Our one-click bulk upload option will also help you upload your course sections and lessons simply. From there you can customize your content, preview, and publish.
If you want a template to create your course outline, then look no further. With Teachable’s outline templates, you can be led through creating a Course Outline in a step-by-step process. To get it, just click here to download for free! You can even think of it as a preview of what’s needed if you’re still in the ideation phase of creating your virtual product.
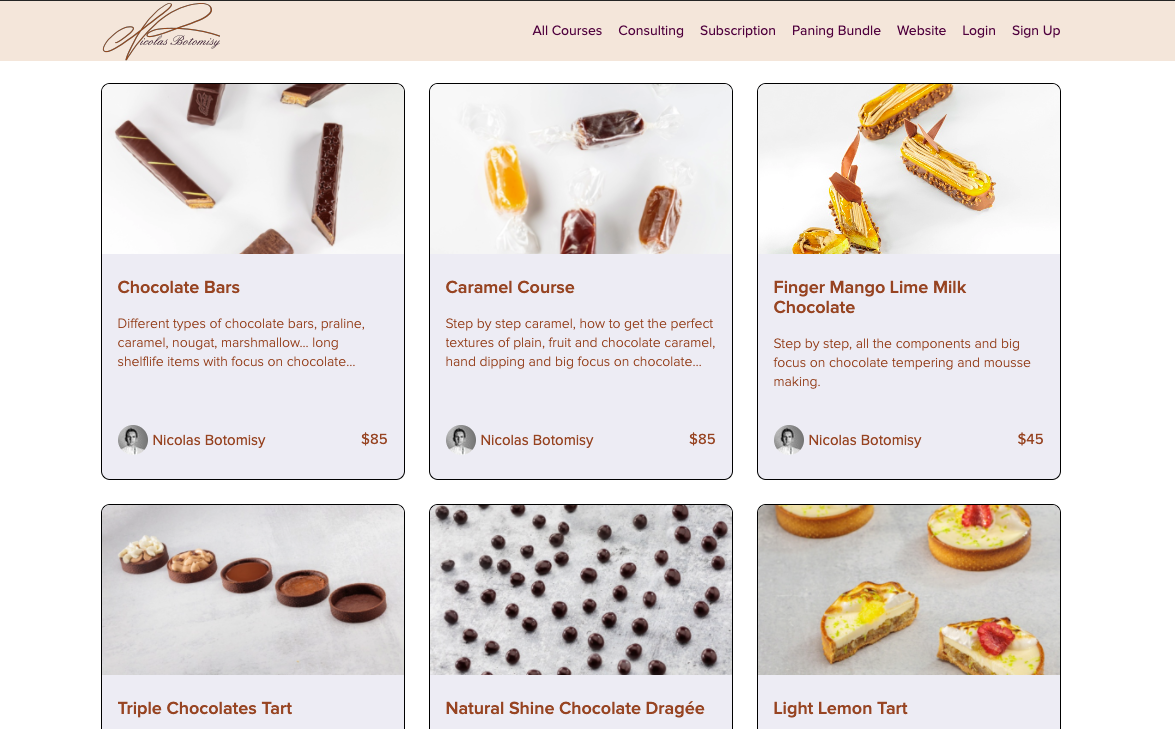
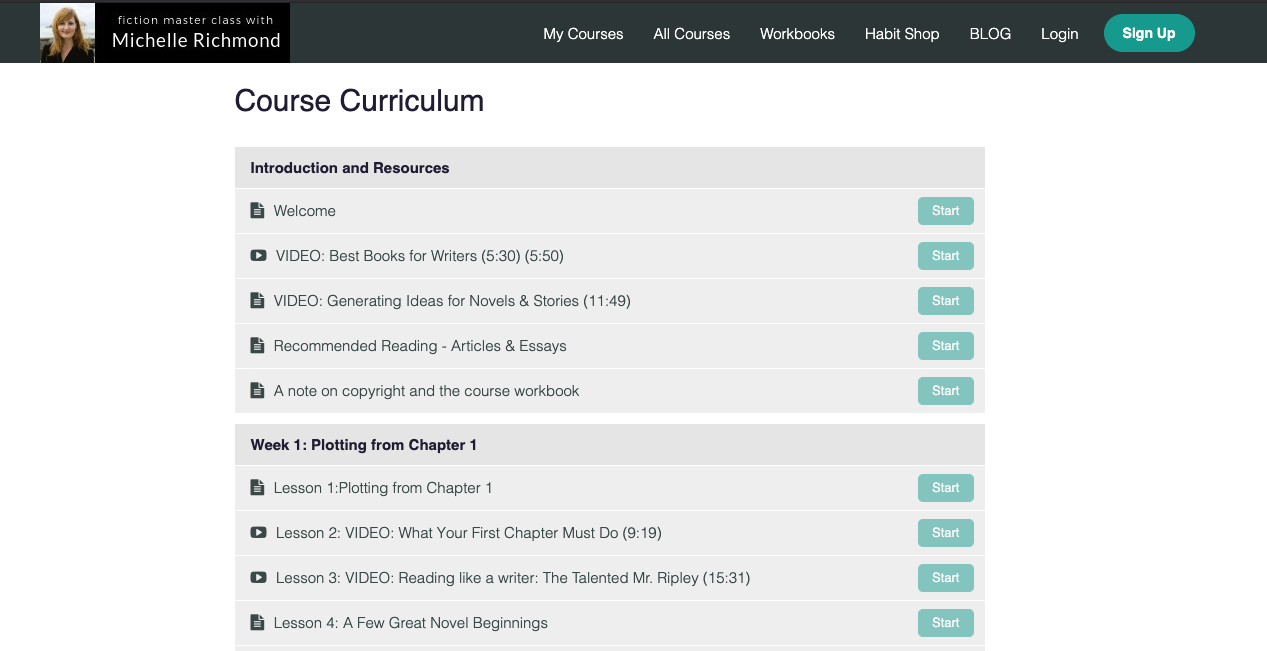
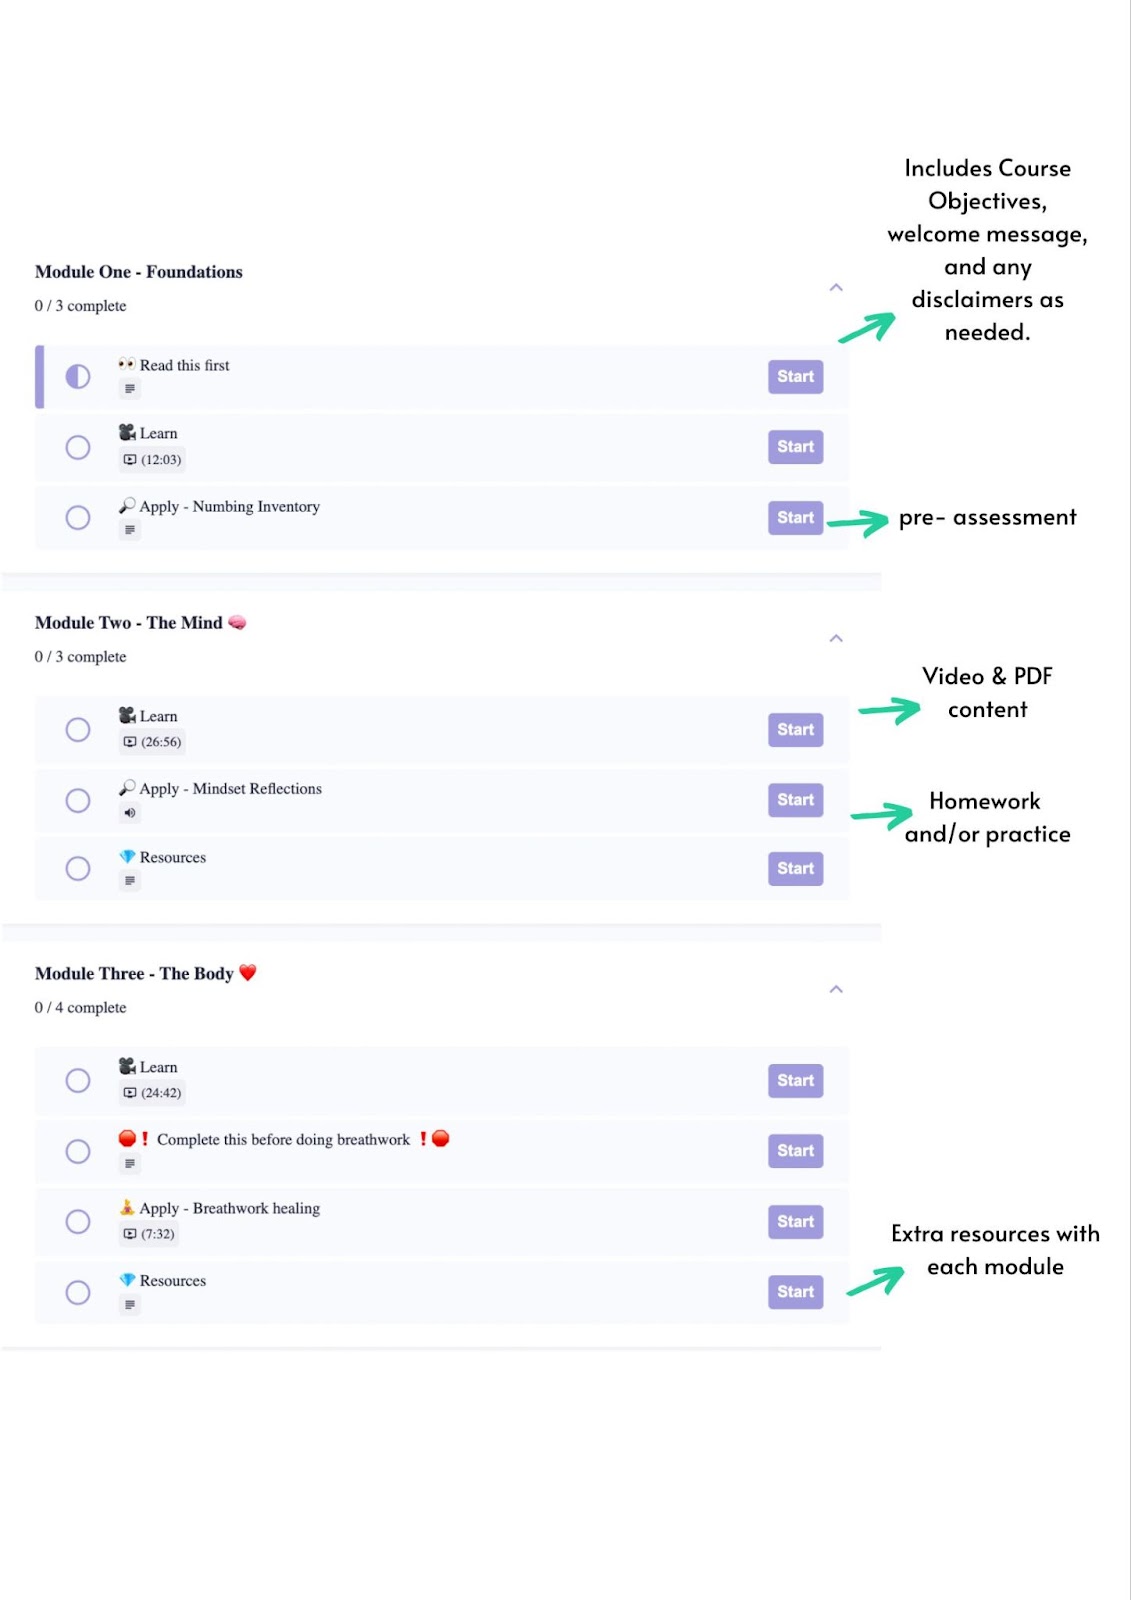
The example below shows how your course outline could look once it’s uploaded onto the platform. Splitting the modules into different categories is a helpful way to keep things organized for your students.
{{aicurriculum-component="/blog-shortcodes/blog-cta"}}
Outlining your course doesn’t have to be daunting. And, putting in just a little bit of elbow grease before you start creating will not only save you lots of time and energy later on, it will also enhance the learning experience of your students. Future you is already thanking past you.
Creating a course outline is an essential part of producing your course. It provides you with structure and organization, which is very helpful as the process can feel overwhelming at times. More importantly, it means that the course material you’re curating is intentional and focused on providing students with the most value possible—having course objectives that you’re building off of creates a solid foundation for learning. Having this outline also means you can share learning objectives with your students so that they feel empowered in their learning process. Overall, a course outline makes it more clear for you and your students, and provides a sense of ease for you during the creation process.
Generally speaking, a course outline is a tool for course creators to consider during the planning phase, while a course syllabus is intended for students to read ahead of starting the course. Once you’ve created a course outline, you can move on to creating the course syllabus, which includes more detailed information, including the course description, specific modules and assignments, dates, a grading rubric, rules of conduct, and other course requirements and expectations of the teacher.
Additional reporting by Nicole Quintana-Wolf

Knowing how to price your online course is a very common yet oftentimes difficult challenge for content creators. But understanding how to sell online courses and putting a price tag on your knowledge doesn’t have to be intimidating. By valuing yourself, your course, and the work you put into course creation, you’ll be able to come up with a fair price that your audience will be more than willing to pay for.
So exactly how much should you charge? We’ve created a three-step guide to online course pricing to help you figure it out.
Make your baseline price higher than you think. We’re just going to lay it out: Consider pricing your online course at a minimum of $100. Because you’ve validated your idea, acquired an audience, and developed your course, you already know it’s valuable. A good baseline price for a course is $100, if not more.
So, why have a baseline price of at least $100?

With premium pricing, more is absolutely more. Would you believe us if we said it’s as simple as: Charging less means you make less money.
It’s normal to worry about scaring off potential clients with a higher priced course, but playing it safe can actually be dangerous in business as it may not accurately reflect the work content creators put into their offerings. Plus, if you price too low, students might not appreciate it as much or be as motivated to follow through with it.
In addition to the overhead needed to create the course, such as video production equipment, you can also factor in soft costs, like the time you put into creating your course, how much you would charge a client for that much of your time, how much you invested in learning the information you’re teaching, etc. Your time and expertise are valuable. While there is a ton of free information available, don’t underestimate the value of the information you curate, organize, and package for your students. It will save them time and energy, and make their lives easier in the long run.
It can be difficult to measure the true value of your course, which gets easily entangled with financial gains. When considering what makes your idea or offering valuable to others, go beyond what you’re selling and consider why you’re selling it.
For instance, you might be an art teacher, who beyond different painting techniques, empowers students to explore their creativity with confidence and playfulness. Or you may be a yoga teacher who doesn’t just demo the fundamentals of poses but also offers tools for increasing mindfulness and building resilience, too. Set your prices bearing in mind all students get out of the course, rather than just the course itself.
Meanwhile, you can always reduce the price via course sales or promotions after your go-to-market strategy is finished, but unless you’re prepared to enhance your original offering, it can be harder to raise the price of a course once you’ve announced it to your audience.
While online courses don’t always have to have a high price tag, premium pricing will help you in the long run and has a number of benefits.
How much can you really charge for your online courses? It’s up to you, but arming yourself with some pre-pricing knowledge can be indispensable.
Try this…
Before anything else, you should come up with income goals for your online course. Whatever you’re hoping to accomplish with your business, come up with a goal number.
In real life:
Let’s say you’re hoping to make $5,000 with your online course. With that in mind, if you keep your price point at $100, you need 50 people to buy your course to reach your goal.
But, what if you decide to offer at a higher price point of $250? In that case, you only need 20 people to enroll. And if you price your online course at $500, you only need to sell to 10 people. See where we’re going?
By putting these goals into place, you can establish a clearer picture of just how many people you need to be selling to in order to consider your launch successful.
Generally, you can assume that at least two percent of your email list will purchase it, so you use that as a solid starting point.
In real life:
If you have 1,000 people on your list, 20 people will likely purchase. If you want to make $4,000, you need to sell your course for at least $200 to meet your goal
Now that you’re armed with some basic knowledge on how to price your online course and more importantly, why you should be aiming for a premium price, close the deal for your students with an offer they really can’t pass up.
Pricing tiers make your course accessible to a larger number of students and to students who may not be interested in all of the bonuses you’re offering.
To create your pricing tiers, first decide on which pieces of bonus content you want to offer. Consider which ones make the most sense for your audience and which ones will have the largest ROI. Once you’ve decided on your bonus content, decide how much each piece is worth.
Although not every student may be able to shell out a lump sum upfront, it might be more manageable if your course offers smaller payments spaced out over a few months. What’s more, you can typically have higher price tags on plans that are paid out over time.

Your knowledge inherently has value, but as your prices increase, so too should your offerings. Some of the best ways to enhance your course content and add value don’t have to be overly complicated. Just learning some basic tricks for how to market online courses can help.
Remember: Setting your rates is upholding a boundary. It teaches clients how to treat you and respect what you have to offer. So price accordingly.
Premium pricing will help you in the long run and has a number of benefits. Consider pricing your online course at a minimum of $100. Once you’ve validated your idea, acquired an audience, and developed your course, you already know it’s valuable. A good baseline price for a course is $100, if not more.
Create income goals: Before anything else, you should come up with income goals for your online course. Whatever you’re hoping to accomplish with your business, come up with a goal number. Figure out how many people are likely to buy your course: Generally, you can assume that at least two percent of your email list will convert, so you use that as a solid starting point.
People sell courses from a wide range of price points. Some start around $40-50 (though, like we mentioned, we recommend keeping your price at a minimum of $100) while others go up to $1,000 or more.
Sections of this post are adapted from previous content written by Morgan Timm and Katie Davidson.
{{coursepricing-component="/blog-shortcodes/blog-popup"}}