Thank you! Your submission has been received!
Oops! Something went wrong while submitting the form.
MENU
Walkthroughs and instructions for the tools, settings, and workflows that run your online school.

We’re a big fan of digital products – and for good reason. As we’ve explored in depth, digital products, such as digital downloads, are a low-risk way to generate passive income with minimal investment necessary. Meanwhile, they offer convenience and support to your audience, not to mention are here to stay. Deloitte’s ConsumerSignals recently found that “US adults surveyed estimate spending from $120 to $130 per month across 12 digital goods and service categories” and that, as a spending category, digital products and services measured comparably to traditional everyday categories, such as apparel and electronics.
We’ve covered what digital products are, the numerous types to consider, and why to sell them, but when it comes to getting started, it can be easy to get overwhelmed or stuck somewhere along the way. Whether you’re in the ideation, design, marketing, or selling phase, we’ve rounded up everything you need to get them up and running – and working for you. Here are digital product creation tools to help you execute with ease.
For many digital product creators, coming up with an idea is the easy part. In fact, creators may have so many great ideas that they can’t commit to or follow through with any of them. Fortunately, there are resources to help you flesh out an idea, so that it can move forward into being executed.
Basic and traditional software, such as Microsoft Office and Google Drive, is helpful but limited, in the sense that capabilities are linear in scope. Fortunately, there are innovative brainstorming apps and mind-mapping tools to make collaborating more effective.
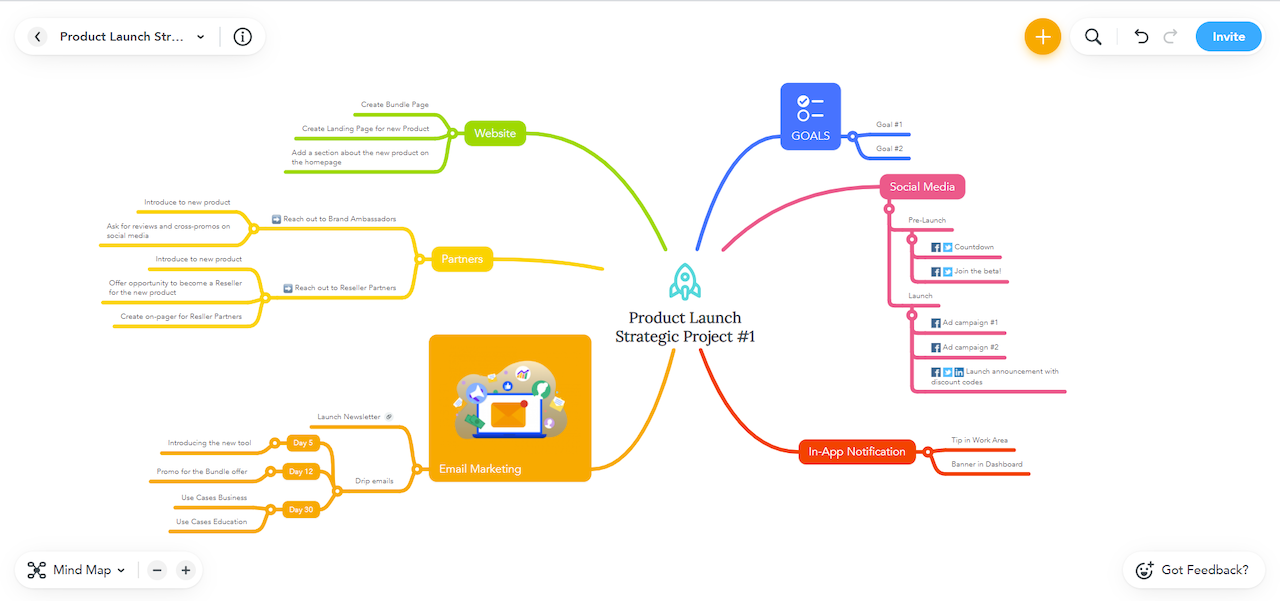
With MindMeister, you can visualize ideas with different mind map layouts to choose from, collaborate with your team, and manage tasks – all in one place. On the free plan, you can create up to three mind maps with unlimited collaborators. Paid plans are under $20/month per user but require a 6 or 12-month commitment.
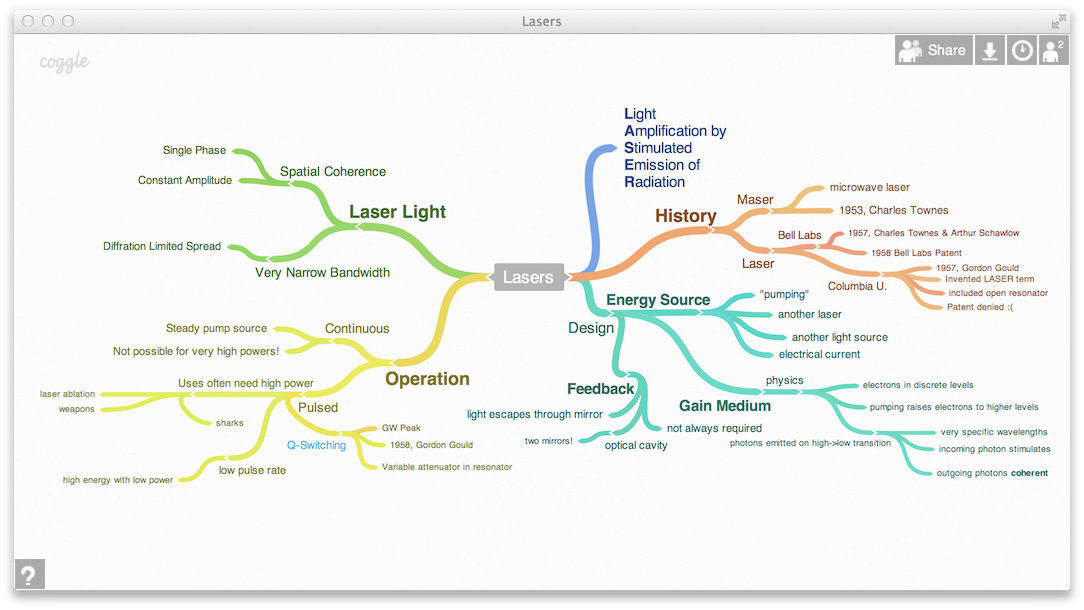
Similarly, Coggle is a web application that allows you to create branching diagrams and collaborate with others. While it doesn’t have as many bells or whistles as MindMeister, let alone the capabilities of Miro or Stormboard, it’s a simple, easy-to-use, and effective resource for organizing thoughts and collaborating with others. With the free plan, you get three diagrams. Paid plans are under $10/month per user.
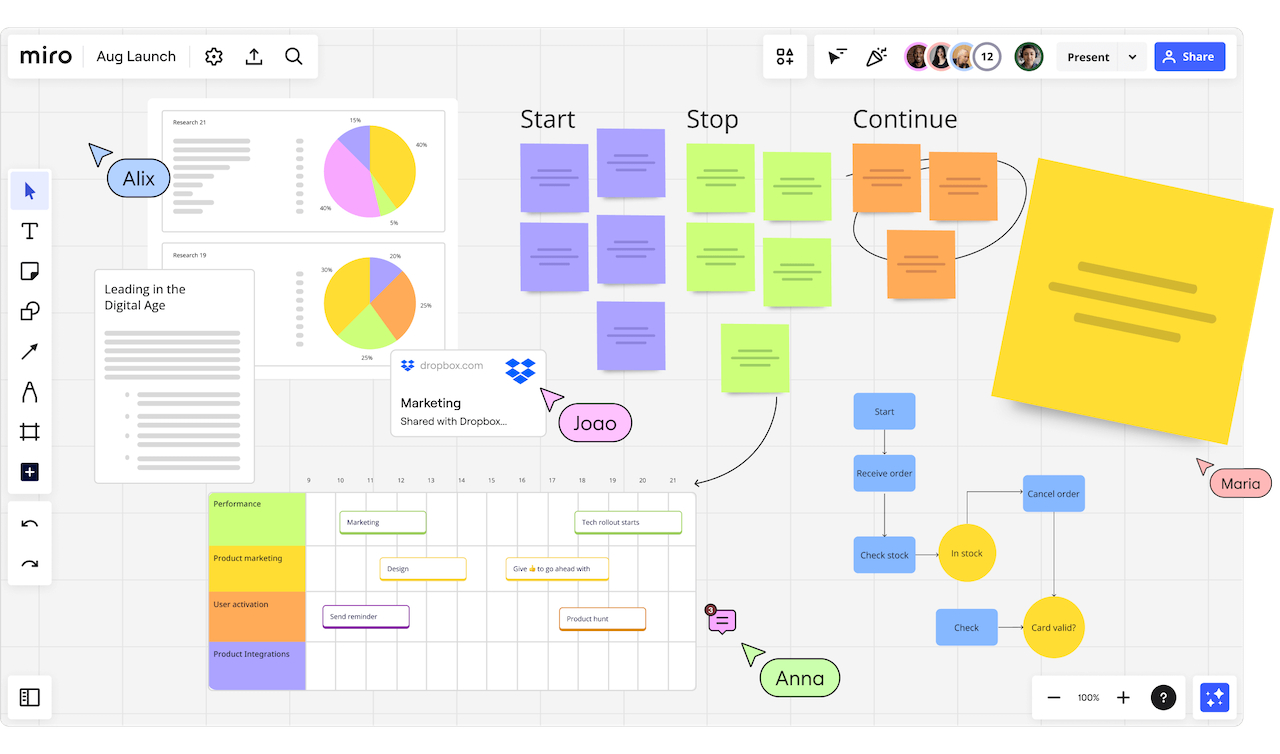
Miro is also a collaboration app with a much wider range of templates and integrations. It facilitates visual project management, making it ideal for team communication. Comparably priced to other mind-mapping software, Miro is ideal if you’re looking for versatility and enhanced capabilities over basic functionality.
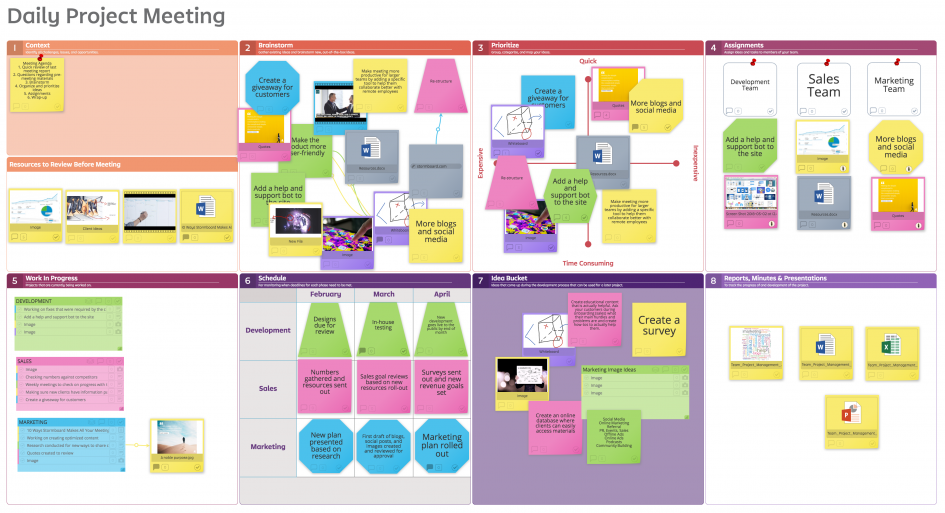
Finally, Stormboard has a more corporate look and feel, helping teams stay on track. Like the others, it offers many interactive features. In addition to collaborative templates, you can hold meetings, manage projects, and facilitate structured brainstorming sessions. While it is trusted by many corporate organizations, the business plan for digital product creators and small-business owners is under $10/month.
Once you have some potential product ideas, you can test them out using simple market research tools. Even if you’re not a researcher or marketer, these simple resources can help you get into the mind of your customer:

Google Trends is helpful for identifying topics that are trending, as well as keywords for content planning and search-engine optimization (SEO). It gives you insight into what people are searching for generally, and you can utilize this free service to discover what people are interested in – what there is already a demand for – and brainstorm product ideas accordingly. In addition to seasonal trends, you can also take note of trends by location and analyze competition.
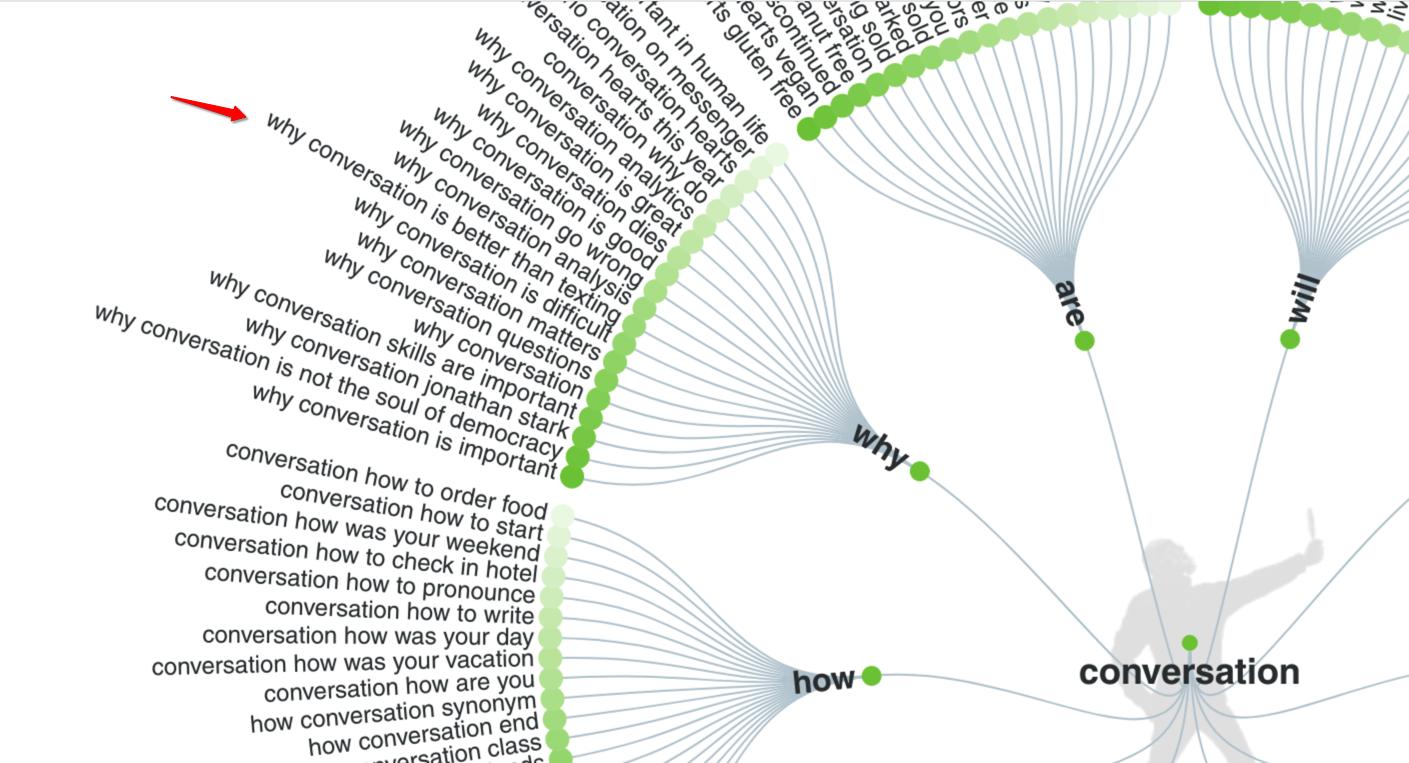
AnswerThePublic is similar to Google Trends, only it expands on topics, so you can get even deeper into the minds of your audience to see exactly what they’re asking about them. Hello, editorial calendar cheat sheet! You can also see analytics and similar search terms to help with SEO efforts. With the free version, which you simply need to create an account to use, you get three searches a day. Upgrading to the $11/month plan gets you 100 free searches a day.
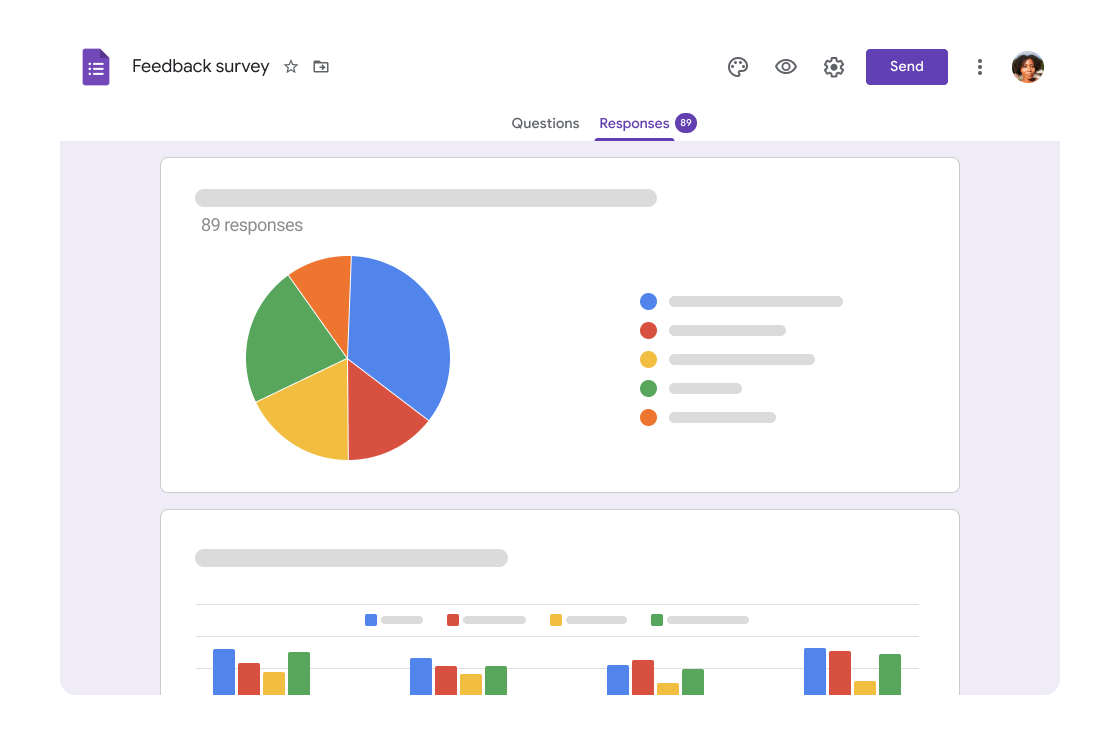
Create an easy-to-use form with various fields, including short and long answers, multiple choice, checkbox, and dropdown, to ask your audience simple questions and gain valuable data about their preferences. Market researchers and public relations specialists use surveys to get feedback directly from their audiences about their likes and dislikes, pain points, experiences, etc. to create a product, service, or experience tailored to them. Google Forms allows you to customize fields and appearance, while collecting, organizing, and analyzing responses that can also be easily transferred onto a Google Sheet or exported.
(Pro tip: Squarespace and Wix users can also create forms connected to your website. You can get notified when new responses come in via email and sync your Google Drive to collect responses in a Google Sheet. Depending on what kind of survey you’re creating, having it live on your website, rather than linking away to a Google Form, might be a better user experience for your audience – and keeps them engaged on your site.)
You don’t need to be a graphic designer or artist to have visually-appealing, attention-grabbing graphics. In fact, with the resources in this section, people will think you have an amazing graphic designer on your team.
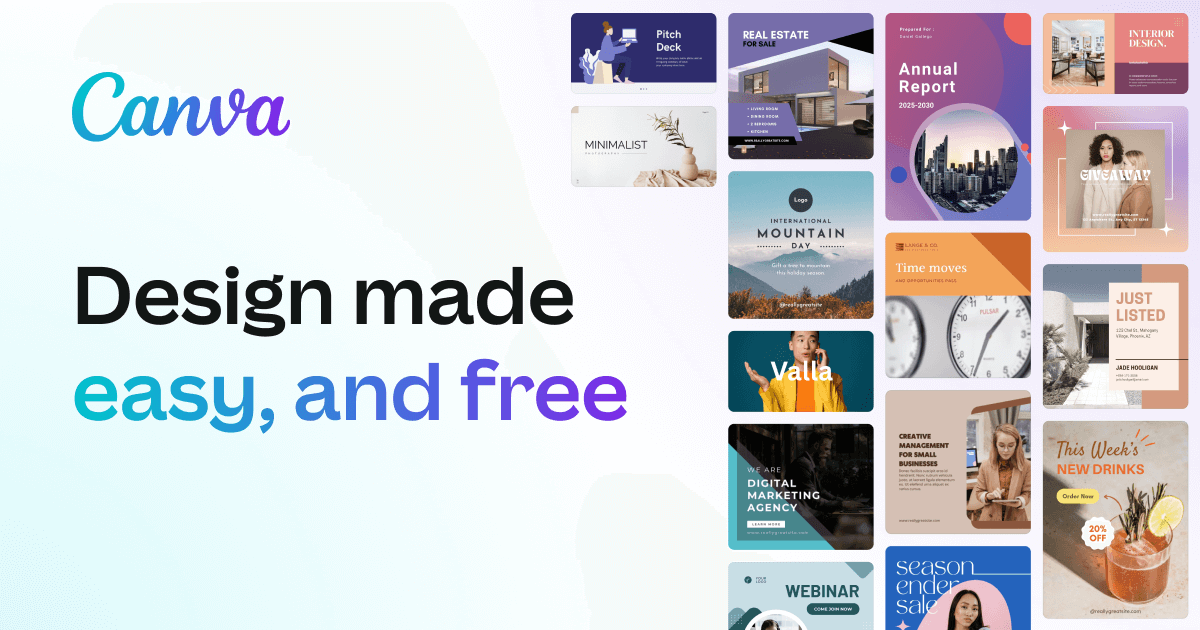
Canva is by far the best for beginners, with endless templates, sorted by asset type (i.e. Instagram post - square, YouTube thumbnail, etc.), and even an expansive library of stock photos to choose from. Beyond social media assets, Canva also offers templates for presentations, resumes, whiteboards (similar to the digital product creation tools mentioned in Section 1), and more – all quick and easy to create, especially with their new free AI image generator. Additionally, Canva has the functionality to collaborate with other team members. There is a free version, but the $15/mo paid plan is well-worth the investment, thanks to the high value and endless features for digital product creators.
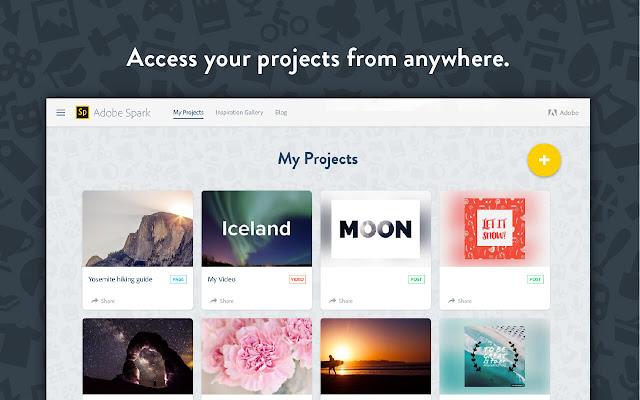
Adobe Spark, on the other hand, offers more advanced design and professional-level features. You might choose this platform if you’re working on more complex customization projects. While it is ideal for intermediate designers, newly-introduced AI features can accomplish advanced-level tasks. If you’re an Adobe Creative Cloud user, Adobe Spark is an obvious choice for seamless integration.
Once you have a product to sell, as well as design assets to promote said product, it’s time to showcase your products on a website. Selling products on your website can come with an additional monthly cost (which is why we’re a bit biased that Teachable truly is an all-in-one solution). Nevertheless, these website-building platforms are great for offering digital products:

Ideal for tech-savvy creators, this classic website builder boasts endless themes and plugins to work with. Be mindful, though, that there are two Wordpress routes you can take:
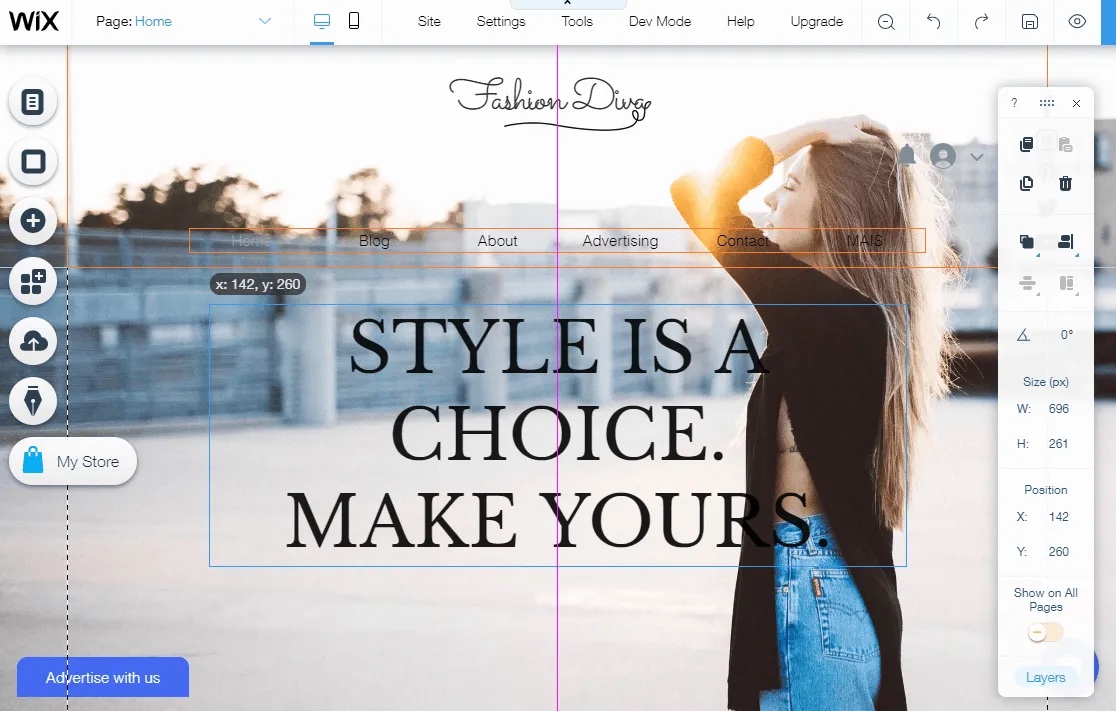
With Wix, you can stay connected to third-party apps you know and love, as well as utilize its business-essential tools, such as email and SEO. With many templates to choose from, it’s on the intermediate side but still easy to use with many support features, including AI plus community of Wix users.
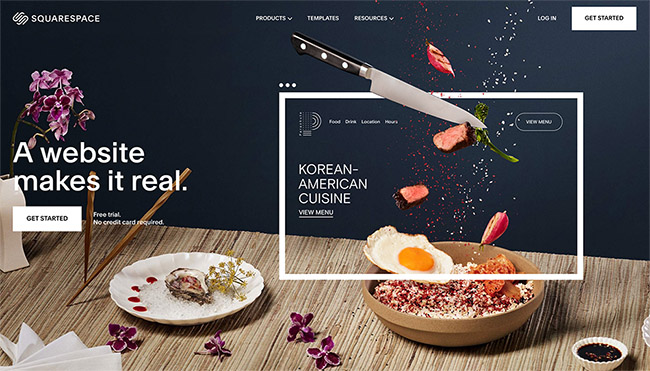
Squarespace has similar features to Wix, but is even more user friendly with simplistic functionality, such as a drag-and-drop builder, and aesthetically-pleasing templates that are easy to customize.
Of course, if you don’t want to go through the trouble of website maintenance, you can lean on us. Teachable is a one-stop shop for creating, hosting, and selling digital products and online courses. We even have built-in AI features to support you in the process!
Whether it’s essential to your digital products or not, video content is a great skill to have and addition to either your offering, marketing strategy, or both. Fortunately, it’s even easier than ever to create quality videos with the help of these reliable resources.
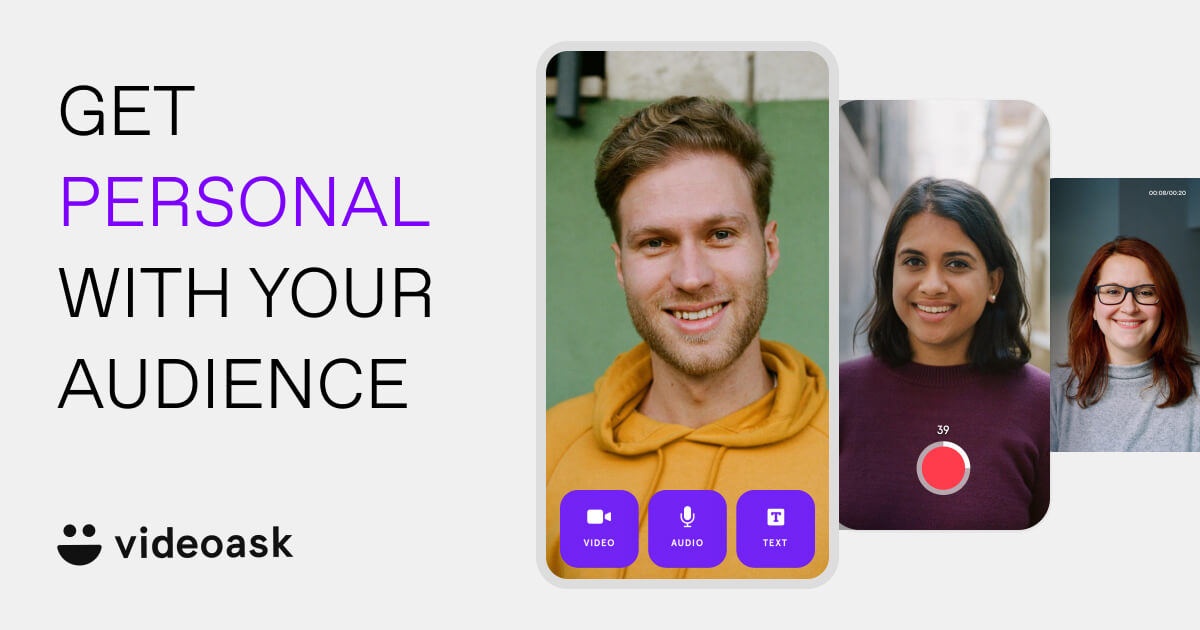
VideoAsk is a beginner-friendly platform that’s great if you’re dipping your toes into video creation. It allows you to add interactive elements, such as polls and questions, to your videos. As with all video resources in this section, there are various pricing tiers tailored to experimenting (with the free plan), individuals ($30/month or 20% less with annual subscription), and businesses ($50/month or 20% less when you pay annually).

Descript, on the other hand, offers advanced editing features, ideal if you’re already somewhat familiar with creating and have content to edit. These features are ideal for fine-tuning and include transcribing and collaborating tools.
You can even leverage AI for video content creation. While we firmly believe AI is not a substitute for human creativity or originality, it can support you in the complex content creation process. Here’s how:
Once you have a home for them, it’s time to spread the word and promote your digital products by sharing the link with your audience. Social media platforms, including Instagram, TikTok, X (formerly Twitter), and Facebook, are an obvious place to start. And if it doesn’t feel that obvious or simply feels unnatural, know that you have to talk about your digital products, so that your audience can know they exist. Engaging on these platforms also helps your audience grow by allowing your ideal customers to find you!
Streamline your social media communications with the help of beginner-friendly social media scheduling tools:
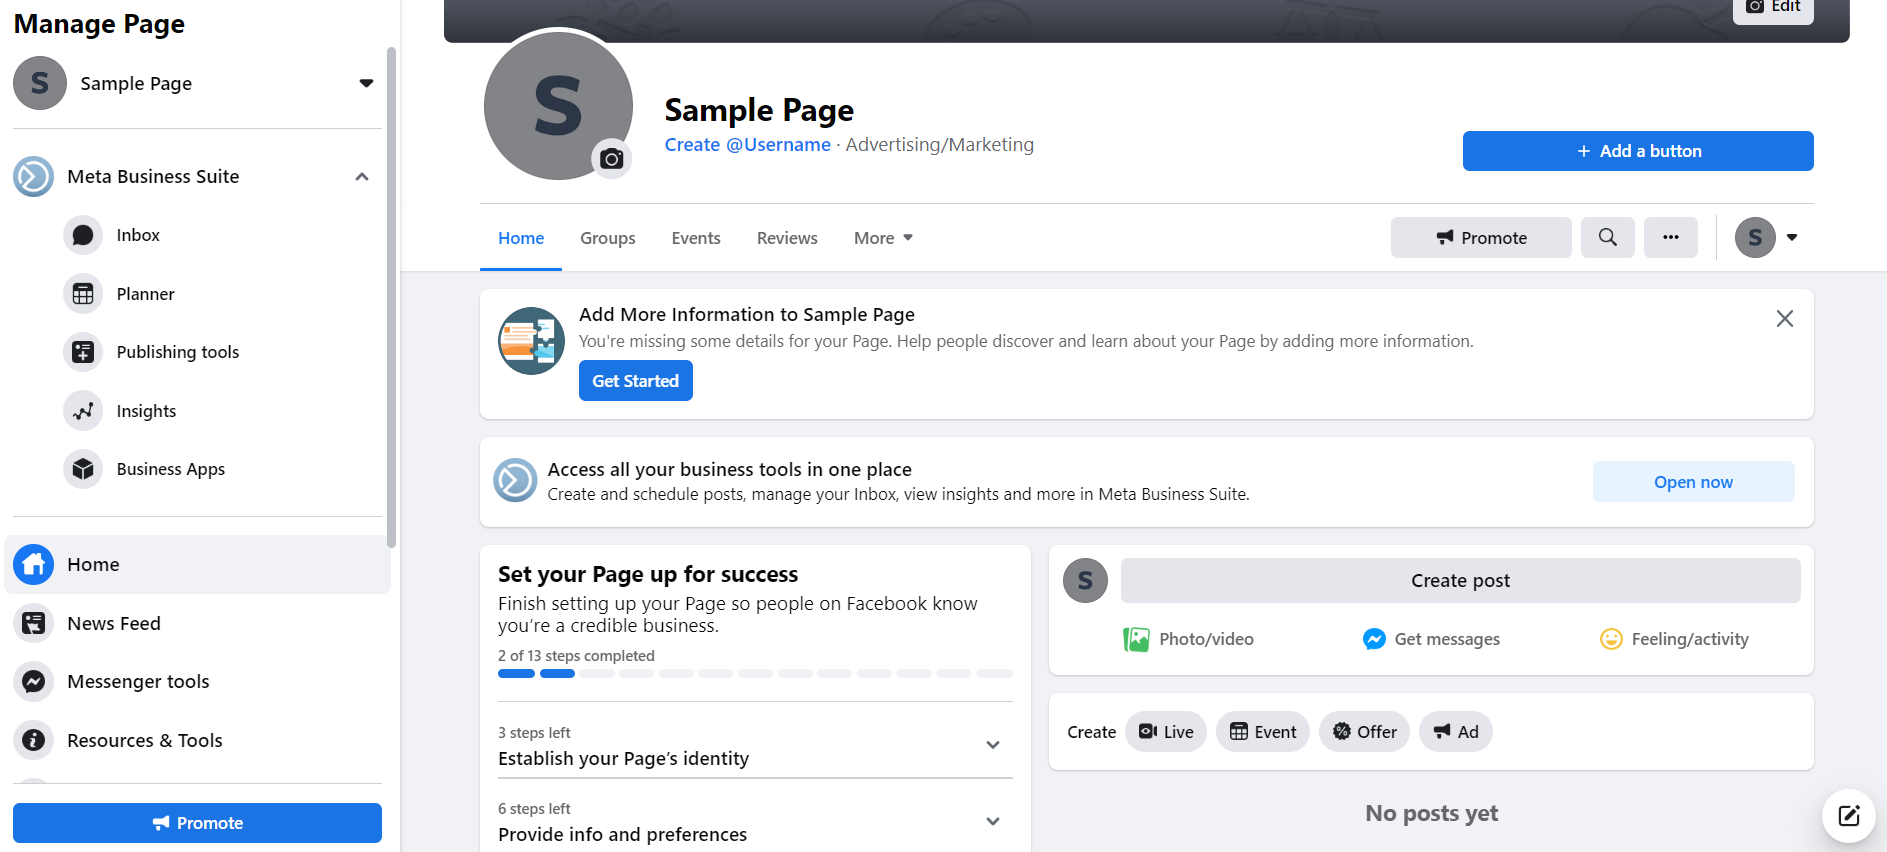
You don’t have to look far for help scheduling social media posts; you can schedule Facebook and Instagram posts all from Facebook’s creator hub, Meta Business Suite. All you need to take advantage of the professional dashboard is a page or business account, which is free. In addition to scheduling, you can also create ads, see analytics on post engagement, and more.
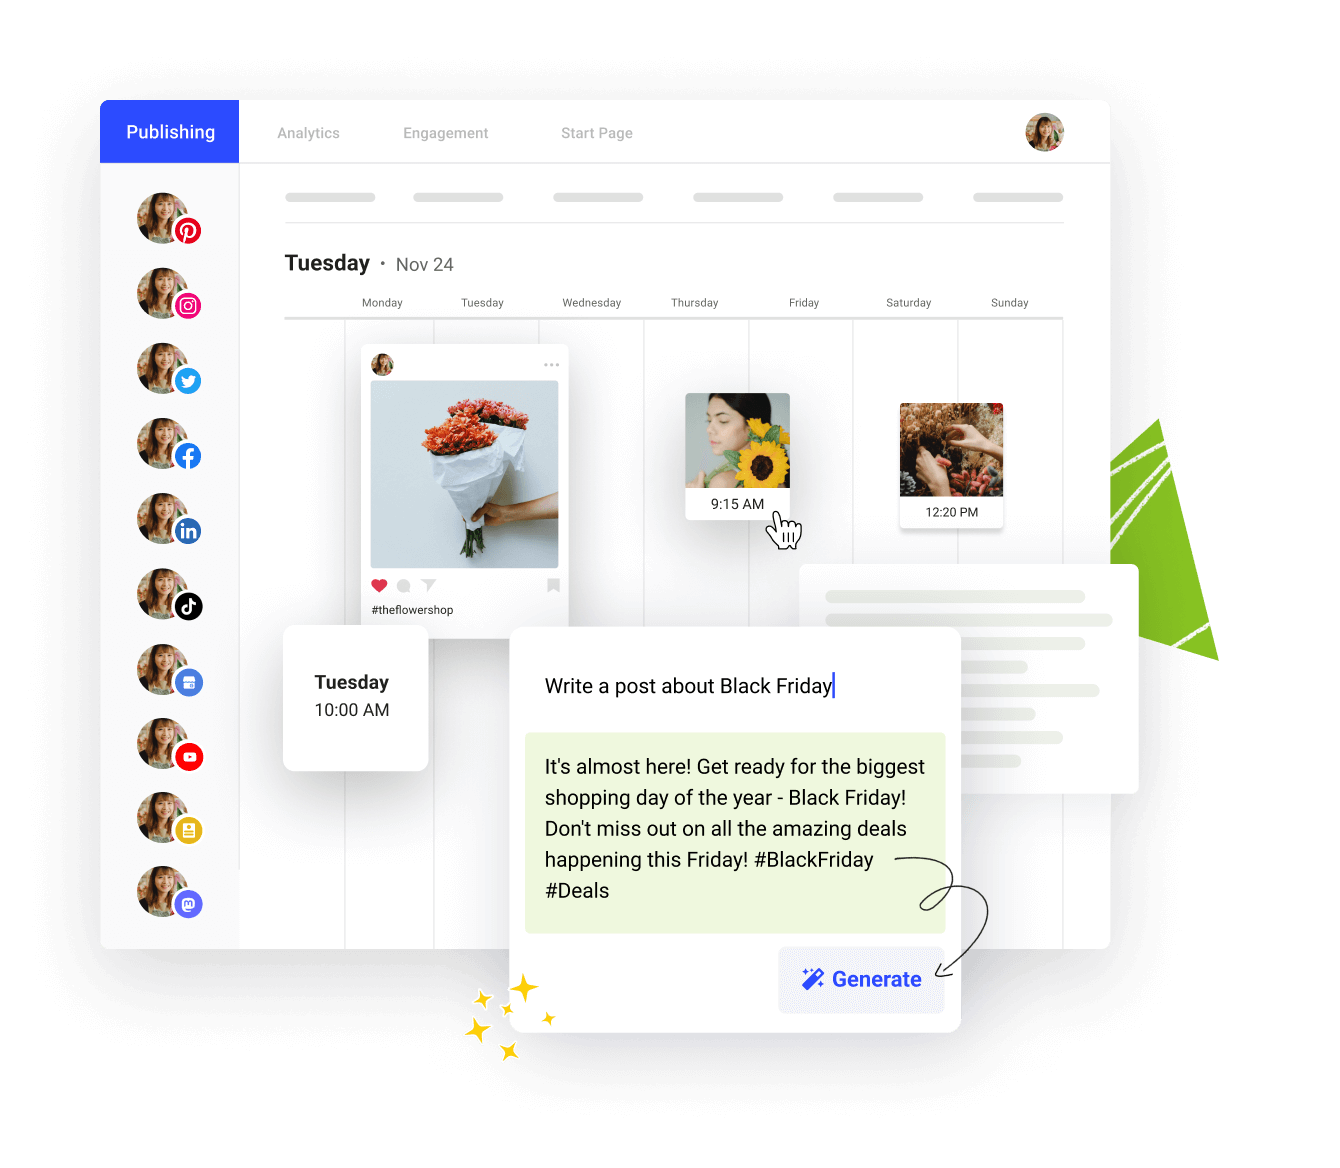
If you’re looking for a simple, streamlined service for scheduling posts and reviewing analytics, Buffer is your best bet.
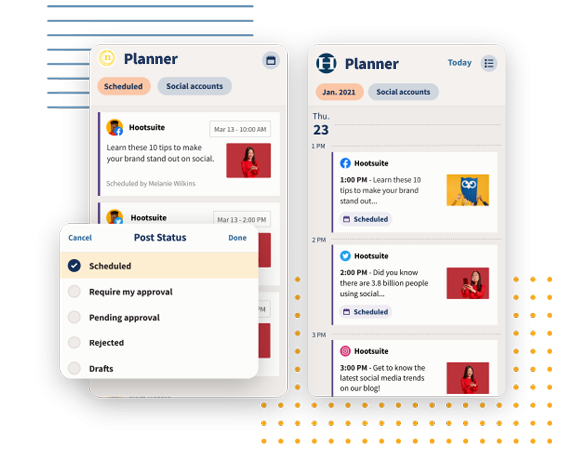
If your social media strategy is a bit more complex and nuanced, Hootsuite is a great go-to, as you can manage multiple accounts and collaborate with team members.
Email marketing is essential for communicating with your audience through newsletters or email blasts. Many website builders, including Wix and Squarespace, now have email marketing features. While you don’t need a website to sell digital products, if you do have one, utilizing built-in email marketing is great for branding and cohesion, as well as keeping everything in one place. If you don’t have a website your products live on, a newsletter provider can help you stay in touch with your audience and communicate how they can find your products and offerings.
There are many email marketing platforms to choose from with comparable pricing (including effective free plans) and features. Here are some options we recommend and why you might lean toward them:
As we’ve touched on, SEO stands for search-engine optimization, and it refers to how easily your product can be found when people are searching for something similar on the web. Fortunately, there are easy-to-implement tools, so SEO can be one less thing you have to stress over.
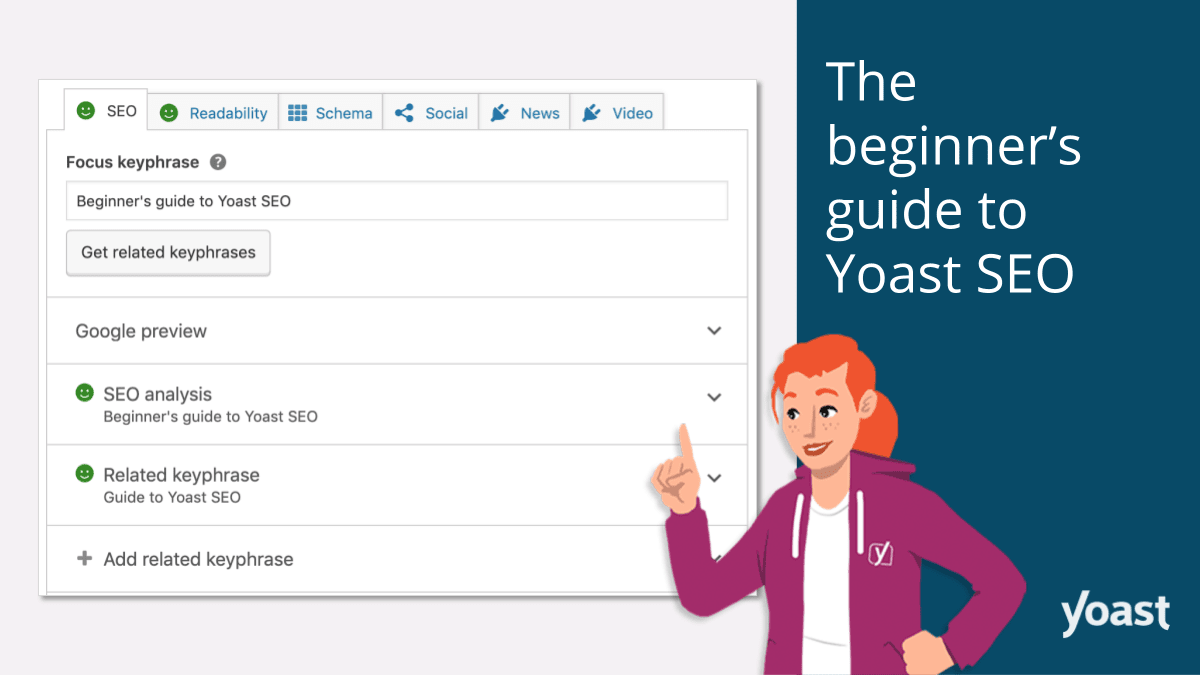
Yoast SEO is a Wordpress plug-in that will scan and rate the copy on your web pages. It offers recommendations for how to improve SEO, making it a must-have for Wordpress users.
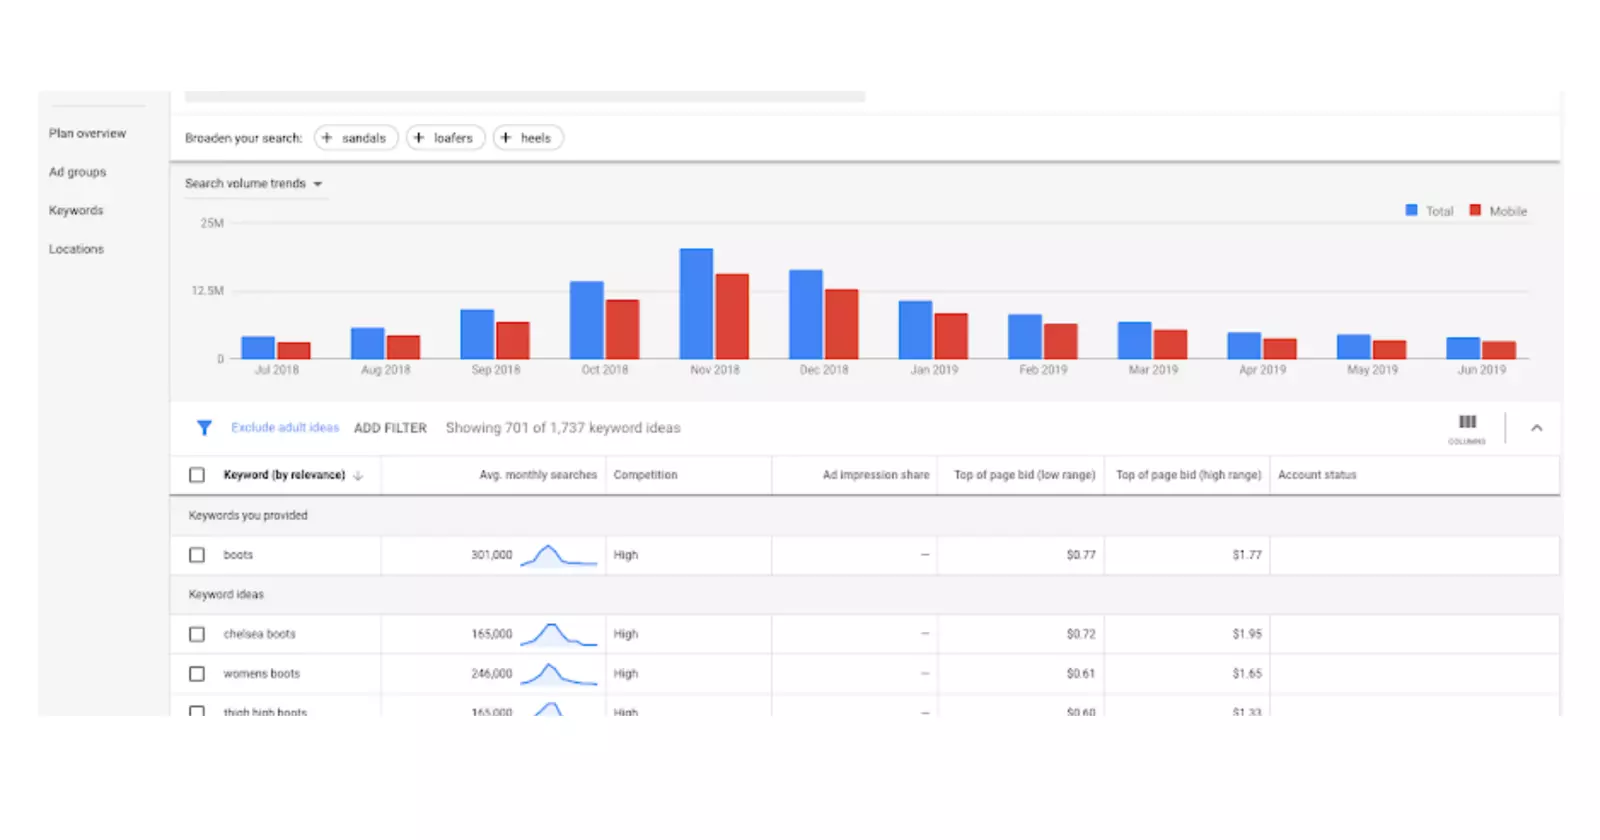
If you’re not a Wordpress user, you can turn to Google Keyword Planner, which is a free tool to help research, identify, and assess relevant keywords you can incorporate on the front and back-end of your website and product page.
Reviewing website visitor behavior is valuable information to understand what is and isn’t resonating. One way to do this is with heatmap tools, which offer color-coded maps of where users click, spend their time and for how long, etc. Understanding user engagement can help with ways to improve and optimize.
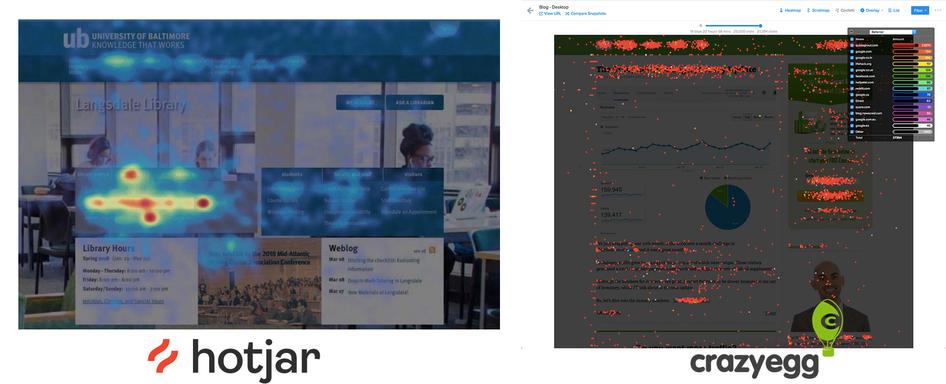
Google Analytics is a great resource for overall analytics, while Hotjar and Crazy Egg have advanced heatmap capabilities to increase conversion. It’s always a good idea to start with the essentials and work your way up to diving deeper as you grow and learn.
Similar to creating forms for market research and analyzing initial ideas, you can also utilize simple surveys to get feedback about your current product offerings. By tracking product performance, you can gain more valuable insight on ways you can improve or what more customers might be willing (and eager!) to buy from you. As mentioned above, this is a technique many public relations specialists utilize to understand the public even better.
As mentioned above, this is a convenient option that is already connected to your Google Drive. It’s easy to customize and helps organize and store the data you collect.
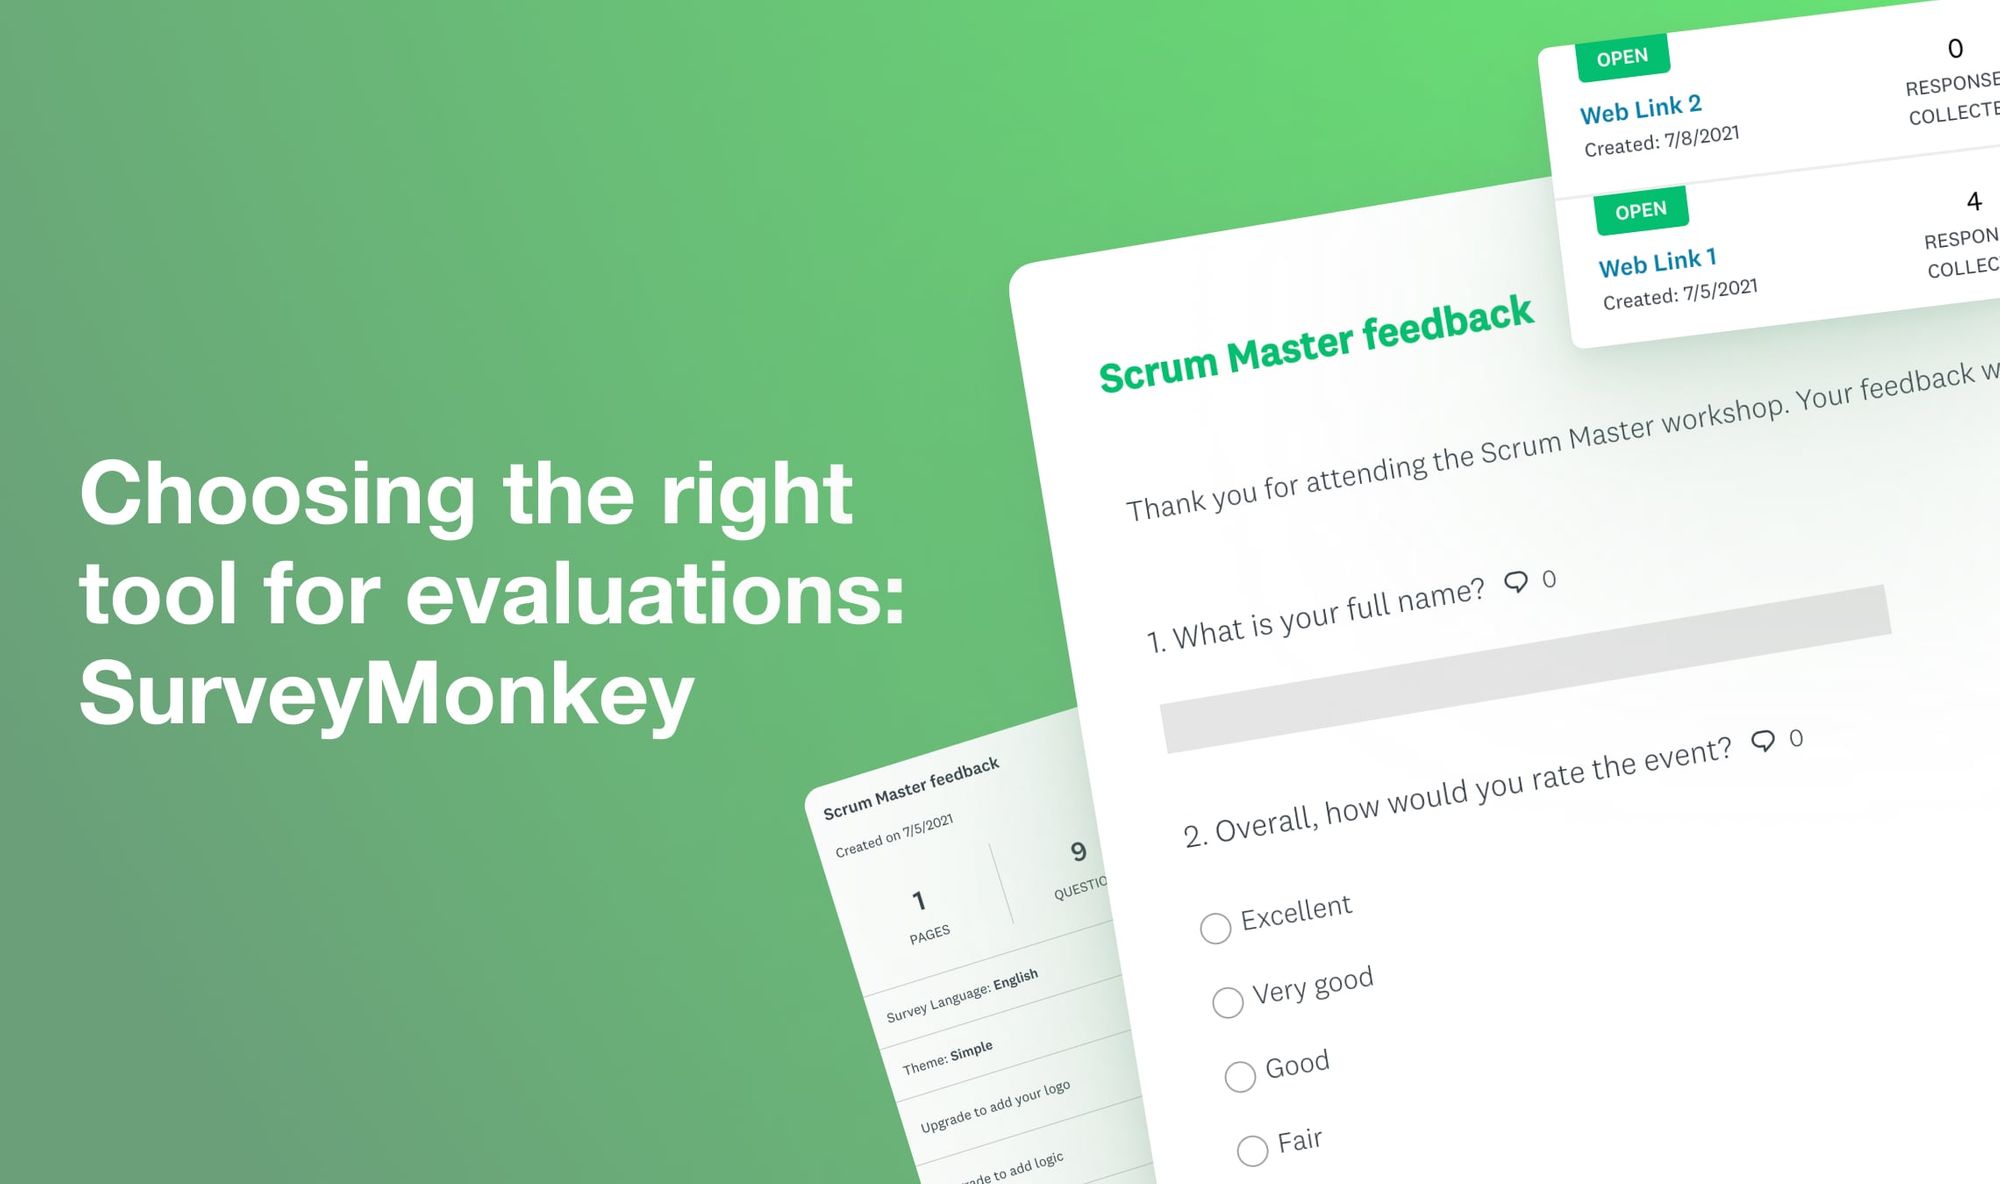
A third party app that can easily be integrated into other web platforms, SurveyMonkey is a tried-and-true survey app that allows you to go deeper with your survey needs. Whether you’re requesting simple feedback or complex research, SurveyMonkey has a vast collection of templates and question types, plus analytics and reporting features. It also comes in the form of a third-party integration, so it’s most likely compatible with your other digital product creation tools.

Typeform offers an engaging user experience, beyond a basic survey. With its interactive interface, aesthetically-pleasing themes you can customize, and conversational functionality, it’s great for engaging with your audience.
Again, most website-building platforms, including Wix and Squarespace, have forms that can be directly embedded onto your website. Not only can you collect information at any time if it’s always available, it’s also a lead magnet opportunity – to capture site visitor information, so that you can connect with them in the future, build a relationship, and market your digital products to them.
Digital product creation comes with a learning curve. Technology is constantly evolving and adapting to offer more intuitive tools and features. It’s important to stay up to date with industry trends. Fortunately, we have many opportunities to support your continued learning, including our blog, podcast, teachable:u (mini courses), educational events, and more.
Even if you don’t tap our resources, there are many creators and experts with their own platforms for sharing digital product creation and selling information, not to mention other online communities and forums, such as Facebook groups or Reddit subreddits, to connect with other digital product creators and learn from their experiences. Research your niche or topics that resonate with you to find some individuals or groups to follow and connect with.
Every digital product creator will have different tools in their toolkit. While there are seemingly endless resources to consider, it’s a good idea to consider and weigh your specific wants and needs before committing to all of them. The key to success is to start with simple-yet-effective, multipurpose resources that are compatible, and gradually build up your tool kit as you scale your offerings and business. (Pro tip: When considering some of these third-party resources, research to see if there are integrations or plug-ins for what you already know and use.)
Embrace the learning process by being open to trial and error. You have all you need to take action and create your first digital product today.
.png)
Hey everyone! Let's talk about something that's quietly revolutionizing how people learn on Teachable, our mobile apps.
Whether your students are on iOS or Android (yes, Android is now fully supported!), the Teachable mobile apps are becoming the secret weapon for creators who want higher engagement and students who need learning to actually fit into their real lives.
And with our recent launches (offline mode for Android and a new download manager for iOS) the mobile experience just got significantly better.
Here's something fascinating we've been observing: the way people learn is fundamentally different when they have mobile access to their courses. And by different, I mean better.
If you've been looking for ways to boost your course completion rates and keep students engaged, I've got great news: getting your students onto the Teachable mobile app might be the easiest win you'll find.
The data we're seeing is honestly pretty remarkable. Students who use our mobile apps show significantly higher engagement and course completion rates compared to those who only learn on desktop.
Why? Because mobile learning eliminates the biggest barrier to completion: finding time.
When your course only lives on someone's laptop, learning happens when they can carve out dedicated, sit-down-at-a-desk time. That's competing with work, family obligations, household chores, and about a million other things.
But when your course is in their pocket? Everything changes.
Your students can squeeze in a lesson during their morning commute. Watch a video while the kids are at soccer practice. Review materials during their lunch break. Listen to content while they're doing the dishes or going for a walk.
Suddenly, your content isn't competing with their schedule, it's part of their schedule.
The result? Mobile learners come back to content multiple times per week, building real momentum and habit around their learning. They're not waiting for the stars to align for a two-hour study session. They're making progress every single day, in whatever small windows of time they have.
And here's what that means for you: students who finish courses leave better reviews, buy more courses, and become your biggest advocates. Completion isn't just a vanity metric, it's the foundation of a thriving, sustainable creator business.
When you're promoting your course, here's how you can frame the mobile learning experience to resonate with your students' real lives:
"Learn on your schedule, not ours."
Your students aren't waiting around for the perfect two-hour block to dive into your course. They're juggling work, family, side projects, and trying to find time for themselves somewhere in between.
Here's how you can help them see mobile learning as the solution:
Emphasize that your course is available on both iOS and Android, which means learning happens on their terms. Not when their calendar miraculously clears. Not when they're finally home at their desk. Whenever a moment opens up.
Help them recognize their "hidden" learning time:
The key message: they don't need to wait for the perfect moment because those don't exist. But lots of small, imperfect moments? Those are everywhere, and they add up fast.
Make it feel sustainable, not like homework.
Help your students understand that learning from their couch, a coffee shop, or anywhere they feel comfortable isn't just convenient—it's more sustainable. When education fits naturally into the rhythm of their day instead of requiring them to carve out dedicated "study time," they're far more likely to stick with it and actually complete your course.
Frame mobile access as what makes the difference between a course they bought and a course they finished.
Here's where things get even better. We just rolled out some major improvements that make mobile learning more reliable and flexible than ever.
For Android users: Not only is our app officially live on Google Play, but offline mode is now available too. Now your students can download their course content and learn without an internet connection your progress will sync up the next time you do have service. On a plane, in a remote area, during your commute through spotty coverage, it doesn't matter. Your learning goes wherever you go, connectivity optional.
For iOS users: We've implemented a completely new download manager that makes the offline experience smoother and more intuitive. Managing your downloaded content is now easier than ever, giving you better control over what you have available offline.
These aren't just nice-to-have features, they're game-changers for anyone who's ever tried to learn on the go and been frustrated by buffering, data limits, or dead zones. Now those barriers are gone.
Whether your students are Team iPhone or Team Android, they're covered. Our mobile apps work beautifully on both platforms, bringing the full Teachable learning experience to every device, with or without Wi-Fi.
This means no one's left out. No more "I'll check it out when I get home" or "Sorry, I can't access that on my phone." Your entire community can learn the way that works best for them.
We're not stopping here. Every update is focused on one thing: helping more people learn more effectively. We're listening to feedback from both students and creators, and our roadmap is full of features designed to make mobile learning even more seamless and engaging.
Stay tuned—there's more good stuff on the way.
Teachable mobile apps aren't just a convenient extra, they're becoming the primary way many students engage with courses. And that's a beautiful thing.
As a creator, think of this as your engagement and completion boost. Encourage your students to download the app. Remind them they can learn on the go, even offline. Make it easy for them to build learning into their daily routine, and watch what happens to your numbers.
Your classroom just got a whole lot bigger and a whole lot more portable.
—
Have the Teachable Android app? We'd love to hear how it's changed your learning (or teaching) experience. Don't have it yet? Download it today on iOS or Android and see what we're talking about.

If you’ve been wondering how to upload a video or add a blog to your school (or anything in between) look no further. Here is exactly how to set up your Teachable school and optimize it for success.
But first, let’s take a little tour of your Teachable school. When you log in, you see something like this. If you don’t already have a school created, click the “create a school” button on the left sidebar.
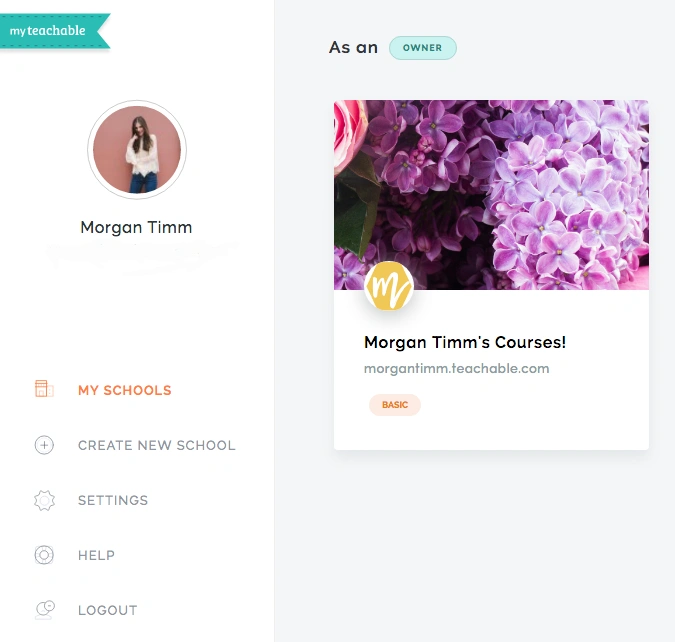
From there the front page of your school appears. Click the “admin” button on the top navigation bar to get to the back end of your school so you can get your first online course live.
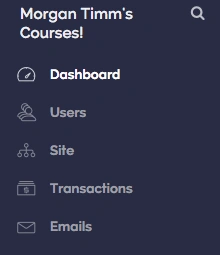
Dashboard: This takes you to your main page where you can see all of the $$$ you’ve made and your student’s activity.
Users: This shows you a list of people who have signed up, when they’ve logged in, and their email addresses.
Site: This opens a new set of menu options (more on that later) that helps you customize the look and the feel of your website.
Transactions: This option allows you to see a list of the transactions that have been made on your site where you can see a history and a breakdown by date.
Emails: This is where you can send email newsletters and updates to your audience.
Here is where things get fun. On Teachable, you have a ton of freedom to customize your site and create it in a way that best represents you and your brand. After hitting the “site” button a new set of menu options appear that looks like this:
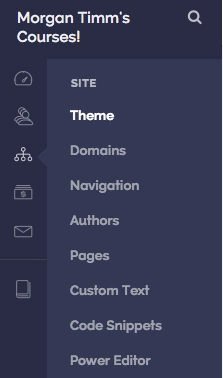
I’ll break this down using specifics, but first let me give you an idea of what each option allows you to do:
Theme: Add a custom logo, favicon, and background image. Pick fonts and color schemes.
Domains: Set up a custom domain. This allows you to create something like courses.yourwesbite.com.
Navigation: Select your homepage, add custom links to your site’s header & footer, and create categories to group courses by topic.
Authors: If you have others contributing to your course, you can add additional authors here.
Pages: Create new pages or edit existing pages to your Teachable website.
Blog: I found out that a lot of people don’t even know that you can create a blog with your Teachable site. This section is where you go to write a blog post or view your blog.
Custom Text: Customize text for menu links, buttons, in-app messages, and more.
Code Snippets: Include code snippets like the Facebook pixel, or add custom CSS across all pages on your site. This section might look intimidating – but we’ll go into depth later.
Power Editor: Here is where you can go deep in customizing your school’s templates and add in custom code.

The first section you can customize under the “theme” tab is your logo and background. This is where you add in your own branding and imagery. You use your own images, or we’ve got some free stock images you can add in if you prefer, too.
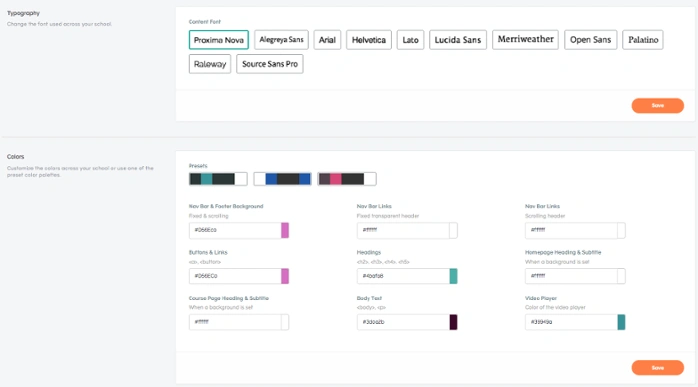
Your next customizable sections are the typography and colors which go hand in hand. Here you can choose your desired font and create a color scheme, too.
When you choose colors, consider things like readability. Even if light blue or bright yellow are you favorite colors and used in your branding – they aren’t the best options for things like the body text.

You can also check or customize your domain for your website. If you’re on a paid plan you have the option of changing your domain to a custom one.
Customizing your navigation is great if you’re hosting multiple courses or creating a full website and blog out of your Teachable school.
Here you choose what page is your homepage. If you only have one course open for enrollment, make that page your homepage to take one step out of your student’s experience. Or, if none of your courses are open for enrollment yet you can make your blog the homepage in the meantime.
This section is fairly self-explanatory. There are a lot of biz bff’s who go into their course creation adventures together. This section is great for those folk. You add in other authors here, and customize your title.

Again, you can do a lot with your Teachable site including adding a blog or other customizable pages like and “about me” or an “FAQ.”
This is a beefy section where you can customize any and all standard text on your site to better fit your brand and voice.
This is where you can add custom code snippets. These can be used in Facebook tracking pixels, analytics tools, and other web services. This section might look intimidating, but our Knowledge Base walks you through.
The power editor is enabled for people on the professional plan and higher and as the name would imply it’s a powerful tool. It’s for advanced users and not something we recommend messing around with if you’re not very comfortable with code.
Once your school is up and running it’s time for you to start creating that course that’s floating around in your head for months. We already have a ton of content on how you can actually get your content planned out and created, but we haven’t talked much about getting it up into your Teachable school yet.
Under the “courses” section you can click the orange “create a course” button in the upper right hand corner and you see text boxes where you can enter in your course’s information.
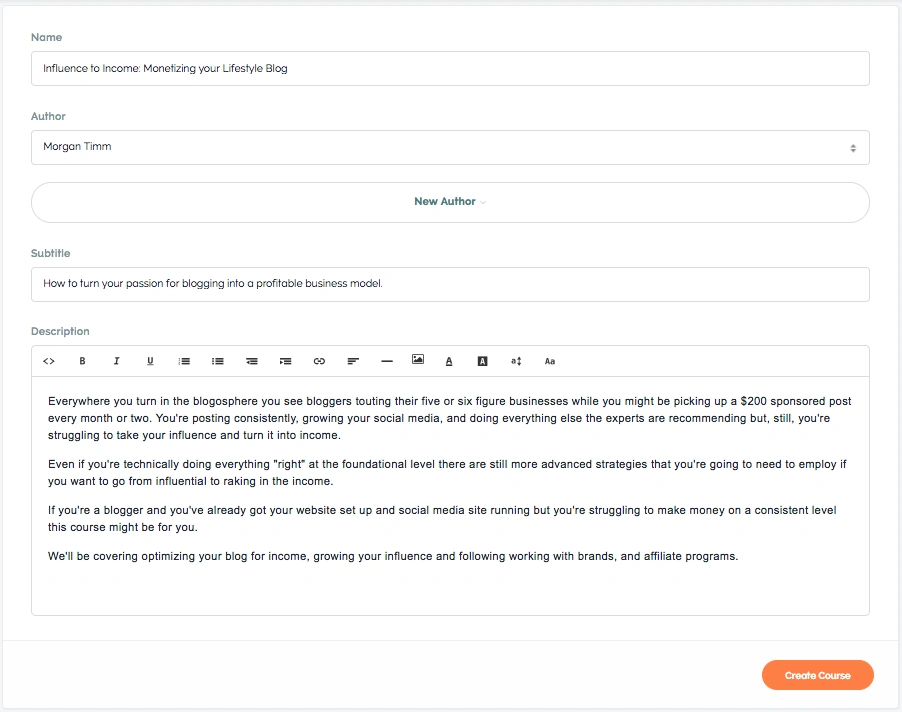
Fill this out with the title of your course, the authors, a subtitle, and a description and then hit “Create Course”.

This section is where you can add and fill out the different sections and lectures in your course.

There are four different pricing plans you can use for your course. Free is pretty self-explanatory. Subscriptions allow you to choose a monthly or annual price your students pay. One-time purchases give your students lifetime access to your course for a fixed price. Payment plans allow your students to pay a fraction of the total cost each month until the course is paid off.
Once you hit publish on your course a page opens where you have a lot of customization options. Plus, you can refine the information you filled out in the beginning, customize your SEO, add branding and promo videos, and delete or duplicate your course.
Again, let’s take a look at the sidebar you’re presented when you’ve got a specific course open in your admin section.

Information is the page we just covered where you can do everything from change the title of your course to delete it entirely.
The sales page section allows you to completely customize your sales page and make it beautiful. If you’re looking for pointers, check out our sales page blog post.
Curriculum is where you go when you want to add or edit sections or lessons.
Pricing allows you to add or change the pricing plan.
Drip is an interesting feature that lets you release lessons over a period of time. You can read how to set drip up here.
Coupons allow you to create coupons for your course – pretty simple.
Students is where you’re able to access who is signed up for your course and their email addresses.
Bundle contents allows you to group more than one course together and sell it as a bundle. This is great if you’re giving away bonuses for people signing up.
The thank you page is where you can customize what your students see after they sign up for your online course.
Reports are available on professional plans and above and show insights into your course with in-depth video engagement data, leaderboard, and quiz grades.
As we mentioned earlier, Teachable is your one-stop-shop for creating your online business. It can host a blog. Setting one up is easy, too.
Furthermore, here is the long version of how you can set up your blog, but if you’re looking for something short and sweet, the process looks like this:
Blogs are living websites that are constantly being updated. Luckily it’s easy to add new blog posts to your Teachable blog.
You might already have your course created and ready to go at this point, or maybe you decided to take the more cautious route and wait to create your content until your school was set up.
If you fall into that latter group, don’t despair! WE won’t walk you through course creation in this post, but that’s only because we’ve thoroughly covered the ins and outs in the past.
At this point hopefully your Teachable school is up and running, and now you can refer to our posts on marketing your course and making money. However, if there is anything that you think we missed on setting up your school and adding content let me know in the comments! We’ll go back through and answer any question you might have.

When you’re running an online business, it’s important that you’re using tools that work well together. And one tool we find most of our successful course creators are using? ConvertKit.
ConvertKit is an email marketing service that many top online entrepreneurs use to send out newsletters, launches, and invites to their audience. If you have a website, ConvertKit also allows you to customize and embed forms on your website to convert your audience into subscribers.
Luckily, it’s easy to sync your Teachable school with ConvertKit, and every time someone enrolls in any of your courses, they are added to your ConvertKit account.
Before we get started, let’s talk about who can connect their ConvertKit account with Teachable. On our end, all you need to connect the two is to be signed up for basic, professional, or business plan. You’ll also need a ConvertKit account. ConvertKit is a paid subscription that varies in price depending on how many subscribers you have.
Like I mentioned, making sure the tools you’re using in your business play nice together is so important for several reasons. One? It saves you time by automating things you’d otherwise have to do manually.
For example, if somebody signed up to your Teachable school from a Facebook ad, that’s great but if you wanted to market to them in the future you’d have to take time to go into your Teachable school, export your email list, upload your email list, add the appropriate tags, and then you can market to them. If you have 4 or 5 students that’s not a big deal. If you have 500? You’d be spending all of your time adding new students to your mailing list. By connecting Teachable and ConvertKit, this will happen automatically.
When you have a new student on Teachable, you can put them into a specific email sequence just for your students. Or, if you’ve got an automatic autoresponder that your audience receives priming them to purchase your course, you can file out the people who are added to your email list because they’ve purchased your course.
The first thing you need to do is log into your ConverKit account and click “automations.”

In the upper right hand corner, you’ll want to click the button that says “integrations.”
On the integrations page, click the Teachable icon and enter your Teachable school url. Click next until you’re prompted to click “done” you don’t need to copy the callback endpoint URL.

After you have connected your Teachable account and ConvertKit account, you can log into ConvertKit to automate actions for new subscribers.
Next, navigate to your account settings and under the “API Secret” section, click “show” and copy your API Secret.
Now, you can navigate to your Teachable account. Once you’re logged in, go to “settings.” Click integrations from the submenu and toggle on the ConvertKit integration.
You’ll be prompted to enter your ConvertKit API Secret, so paste that in the text box. Now, click save and your Teachable school and ConvertKit account are linked.
Now that your accounts are linked, you can begin setting up triggers and actions. For this example, we’ll be setting up a rule that subscribes new students to your email list.
To get started, you’ll log into your ConvertKit account and clicking “add rule.”
Click “purchases a product” and a drop down menu will appear, from there, select “purchases a product from Teachable.”
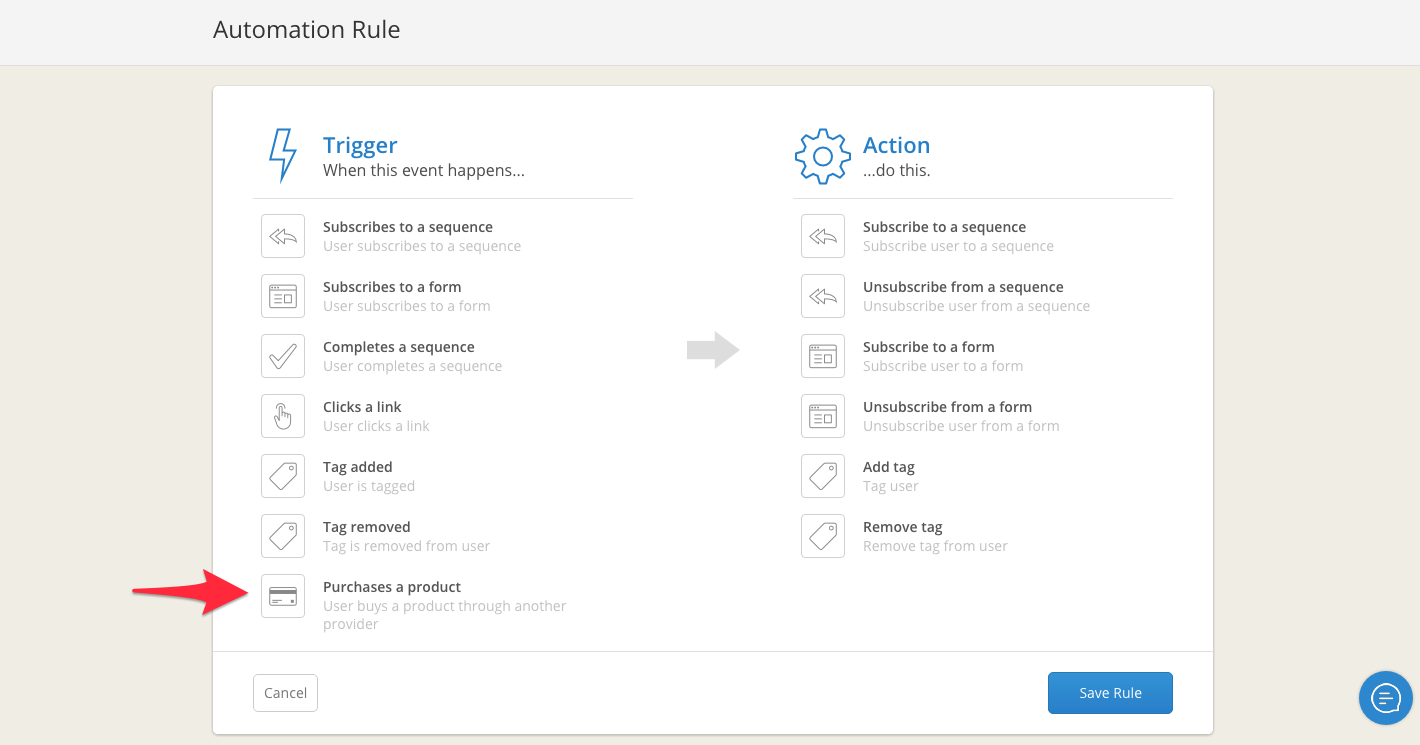
If you have more than one course on Teachable, your next step will be selecting which course you’d like to add the rule for.
Next, you’ll be prompted to add rule. In this example, we’re adding them to your email list. But you could also unsubscribe them from your marketing list or add a tag.
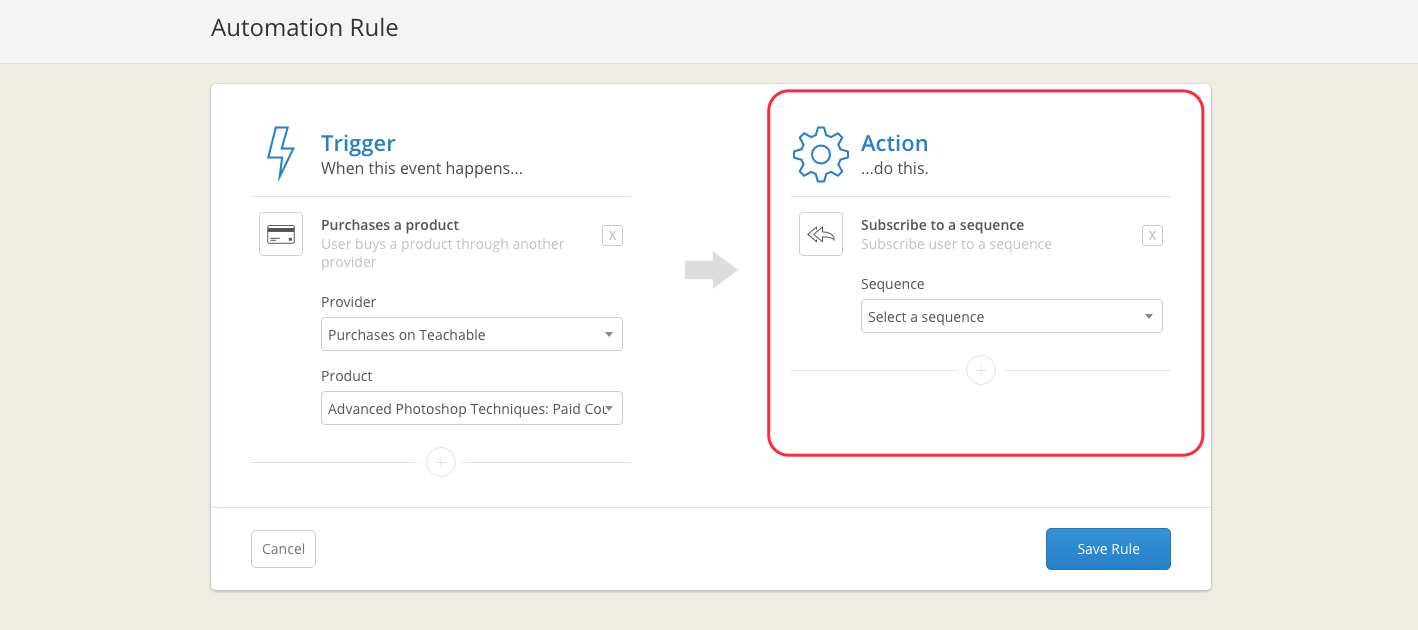
Once you hit “save rule” all new students that purchase your online course will be added to your email list.

Webinars are powerful marketing tools because they help you really connect with your audience. They’re often more attractive to your audience than simple blog posts or podcasts because speaking directly to your audience live on camera feels more personal. But webinars aren’t everybody’s cup of tea.
In fact, they’re some people’s nightmares. Never mind the stage fright that comes from going live on video and knowing that there are hundreds of people watching your every move, the tech side of things can be a nightmare, too. Luckily, we’re walking you through how to host webinars on Teachable.
Creating a one-stop shop for your online business is so valuable because it establishes cohesiveness around your brand and eliminates any potential confusion from your students. While there are third-party webinar programs that are wonderful, hosting webinars directly through your Teachable school can save you money and save your students the confusion of where exactly to find you.
To be clear: Teachable isn’t a webinar platform. And we don’t have a native webinar hosting feature. But, the workaround is simple enough that it may as well be native. To host webinars on Teachable, you’ll need to choose a third-party livestream program to embed into your Teachable school.
Here are a few of our suggestions:
For the purpose of this blog post, we’ll walk you through hosting webinars on Teachable through YouTube’s live stream feature, but just know the steps are nearly identical for all programs.
If you don’t already have a YouTube account, sign up for one and verify your account using your phone number. Once you’re logged into your YouTube account, click the icon in the upper right hand corner of the page and select “YouTube Studio (beta).”
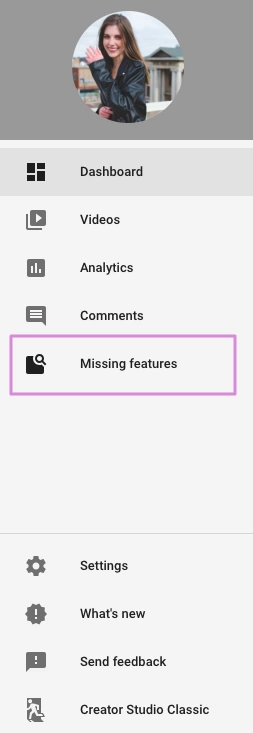
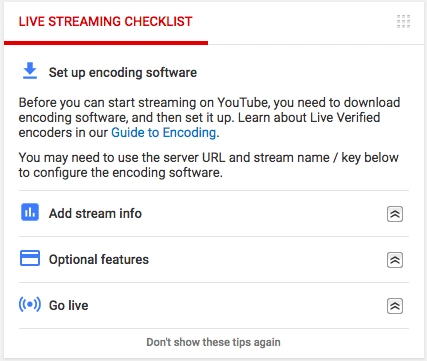
From there, you’ll be taken to the YouTube Studio where you’ll be presented with a new sidebar on the left of the screen. Click “missing features” and then “live streaming.”
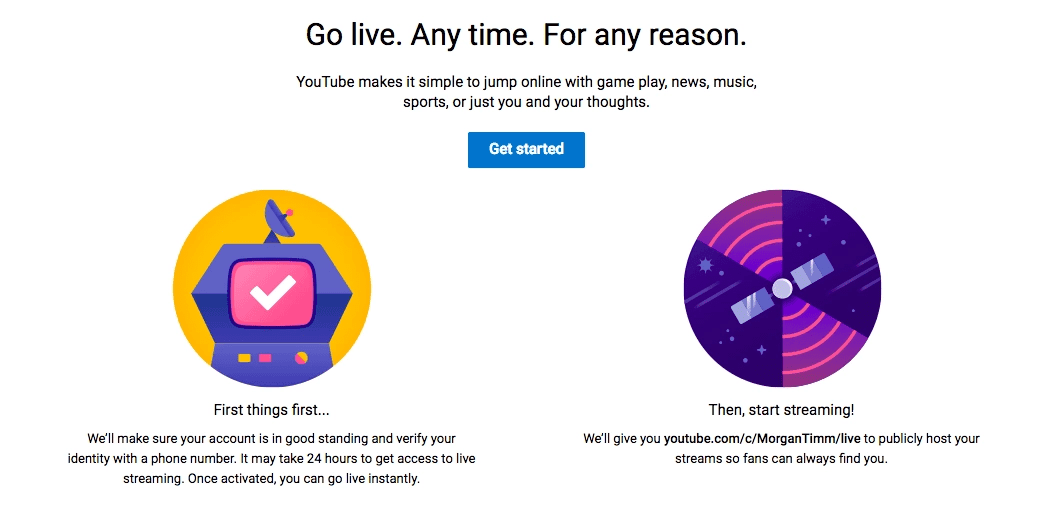
Click “get started.” From there, things are going to get just a tiny bit complicated because you have to set up encoding. Now, this isn’t nearly as difficult as it sounds and YouTube will walk you through start to finish.
Chances are, you’ll be live streaming using your computer’s webcam. With that in mind, select this option on YouTube’s Guide to Encoding page.
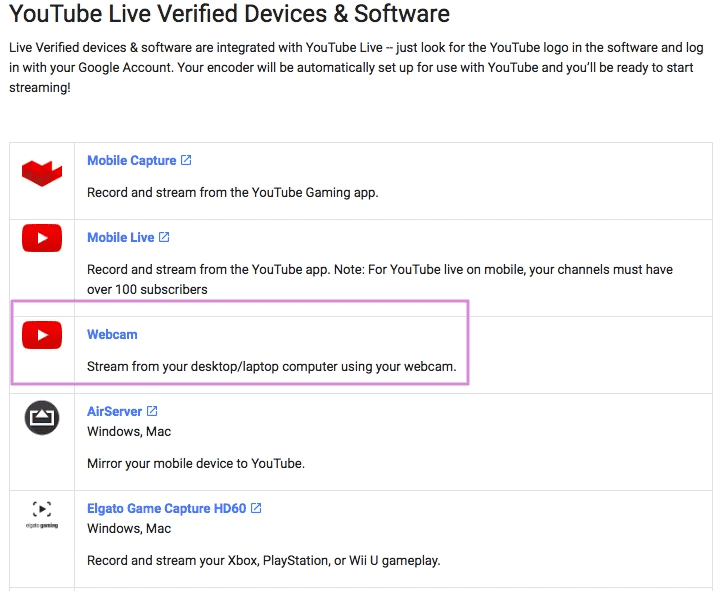
This is one of the most straightforward options. And, there are very few steps you’ll need to take to get started.
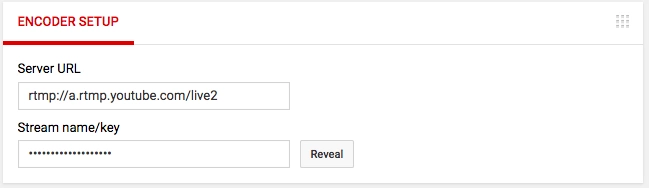
If you’re on the go, you can also choose one of the YouTube-approved mobile stream encoders, in which case you’ll need to download the programs and insert your Stream Key to identify yourself. (You can find your stream key on your YouTube live page.)
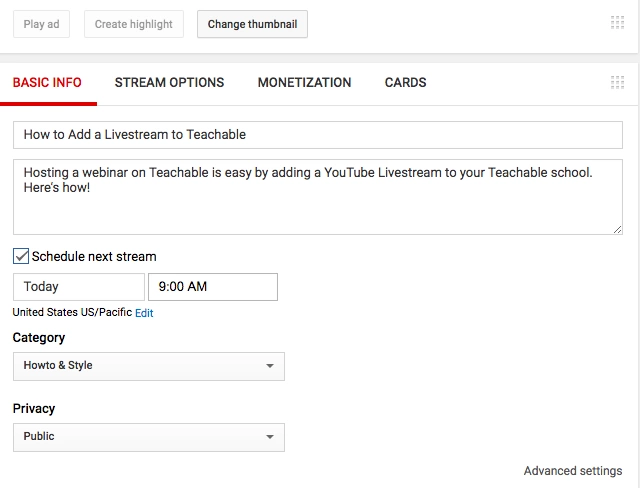
Next step for understanding how to host webinars on Teachable, customize your livestream by adding a title, description, and thumbnail. You should also select a relevant category from the drop down menu and schedule the livestream so it begins at your advertised time.
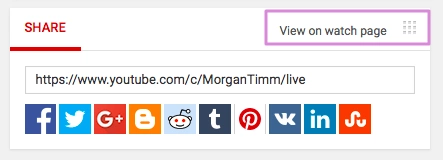
Once your live stream is set up and ready to go, your next step is to embed it into your Teachable school. To get your embed code, scroll to the bottom of the YouTube Livestream page to find the sharing options and click “view on watch page.”
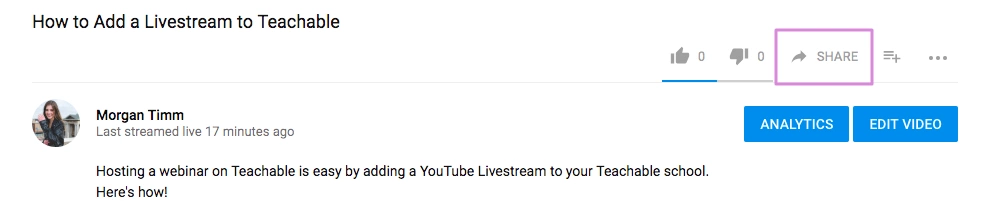
That will take you to the live page of your livestream. If you spend any time on YouTube, the page should look familiar. Livestreams and prerecorded YouTube videos both live on watch pages with the same format. Click “share.”
By clicking share, you’ll pull up a share page with a handful of options. Click “embed.”
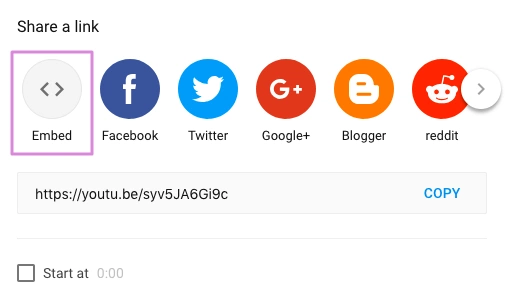
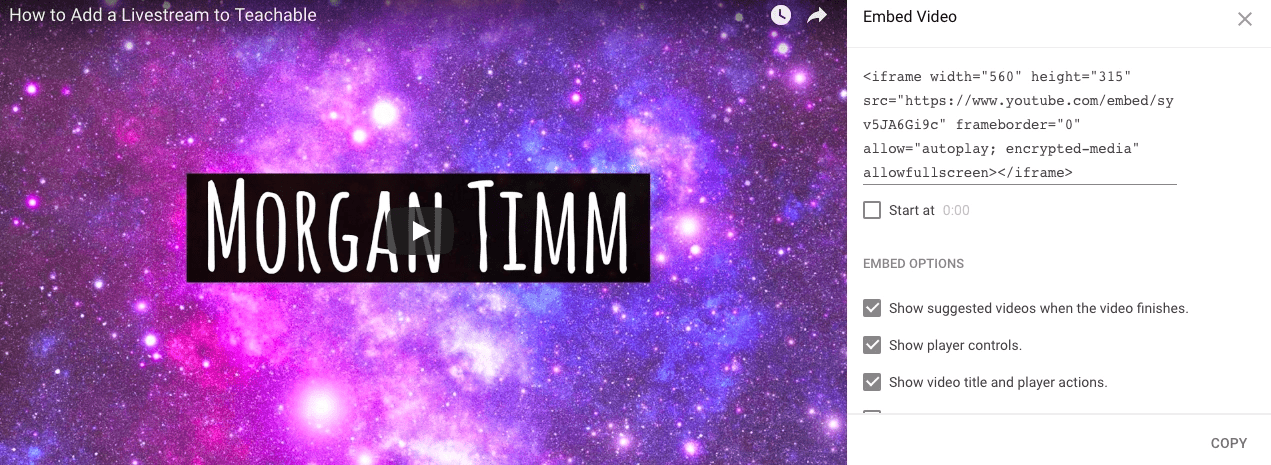
From there, your embed code will pop up. Copy that and log into your Teachable school.
Select which course you’d like to embed your live stream into, and then choose or create the lesson where your live stream will end.
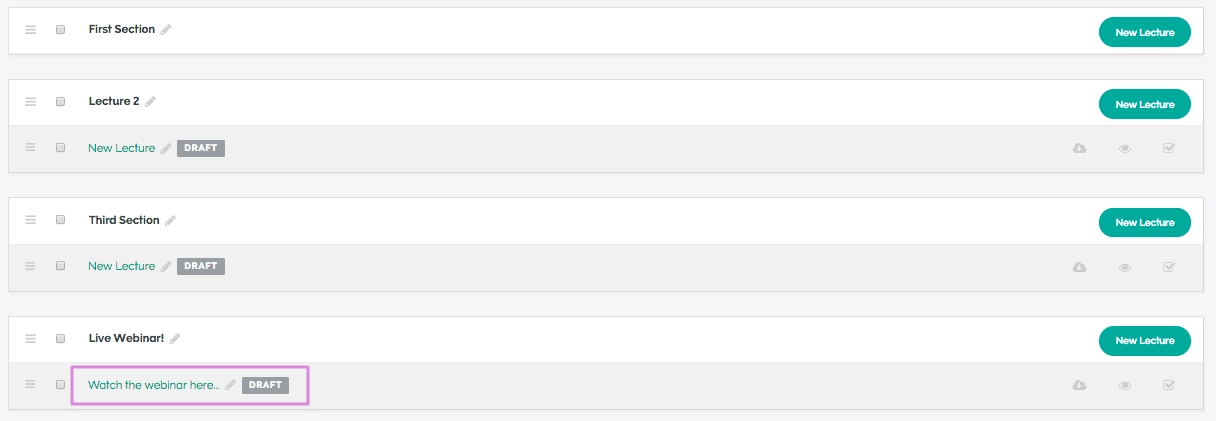
Click “add code.”
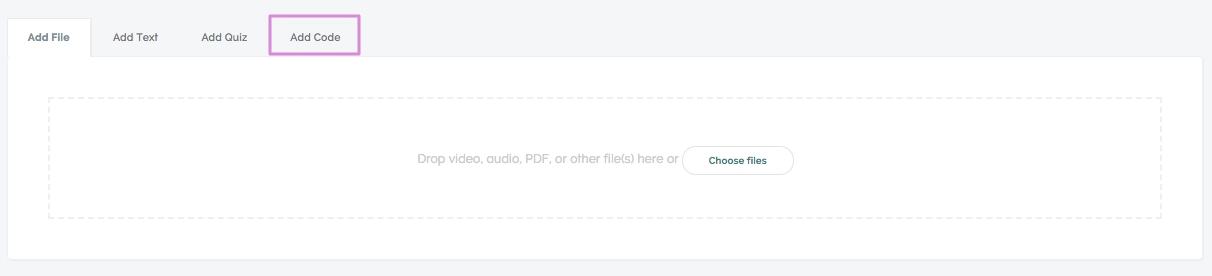
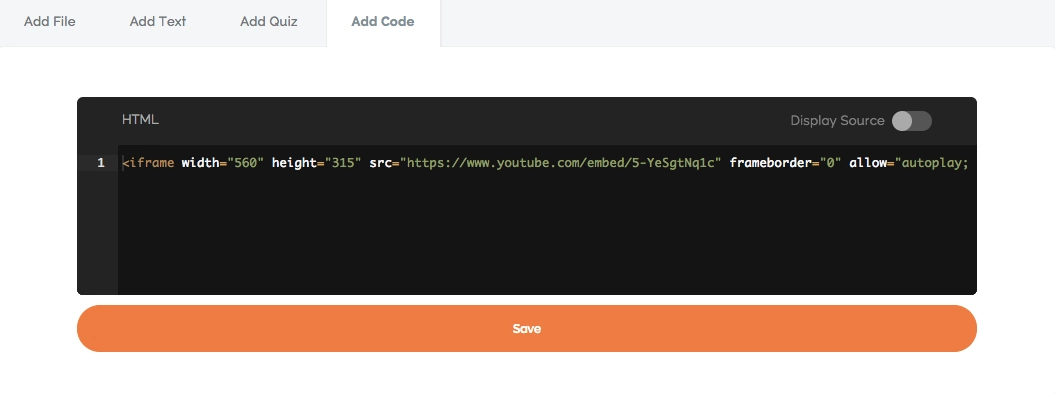
Paste the embed code we copied earlier into the code box and click “save.”
When it comes time to start your webinar, depending on the encoder you’re using, you can either go to the livestream page on YouTube and go live or open the encoder you downloaded, authenticate your livesteam, and click “stream.”
Even if you haven’t created your online course yet, you can still host webinars in your Teachable school to build your email list. If you don’t have a Teachable account yet, you can sign up for one for free here.
From there, make a new “course” (even though it’ll only exist to host your webinar) and name it whatever you’re calling your webinar.
Next, create a new “lesson” and follow the above steps to embed your YouTube livestream into the lesson.
You should also create a lesson letting your audience know where else they can find you and follow you, and link them to other resources you’ve created.
Next, set up the pricing plan to “free” so people can sign up using only their email addresses. You’ll be able to find their emails and add them to your email list in your Teachable admin.
Teachable makes creating professional and beautiful sales pages easy, so you won’t have to fight through coding your own.
Your sales page should walk your audience through what your webinar will cover and who it is for. You can add blocks like testimonials or videos to further compel your audience to sign up.

Many online course creators are juggling a lot at once – launching new offers, onboarding new students, engaging existing students, and staying on top of their marketing channels. You may wonder – how do all these content creators manage to handle it all?
The truth is that most successful creators aren't doing many of these tasks manually. Instead, they use smart automation to build systems in their business that allow them to sell, support, and scale – even while they sleep.
Teachable + Manychat + Zapier integration is one of the most potent automation tools for online course creators, and it can save you hours of your precious time every week without compromising your earning potential. In fact, it may even allow you to increase your revenue.
If you're curious to learn more about how Zapier automation for course creators with Manychats can help transform your business, read on.
Before we dive into the "how," let's first get clear on the "why." So, why would you, as an online course creator, bother to connect Manychat with Teachable through Zapier?
Well, Teachable is your online classroom while you're the teacher running the show. Every teacher needs a good assistant. That's where Manychat comes into play – it can be your virtual assistant that chats with leads and students on Messenger, Instagram, via texts, or more.
Consistently nurturing your warm leads, attracting cold leads, and engaging with your existing students is a key to success for your online course business. But doing all of it manually is a lot for one person, and that's why Manychat is so handy – it can handle many repetitive tasks so you can focus on other parts of your business.
You may wonder – what does Zapier have to do with any of it? Zapier is the tool that bridges the gap between Teachable and Manychat by allowing these two platforms to share information automatically.
Together, this integration helps you:
And that's just the tip of the iceberg of what this integration can help you do to enhance your business while also saving you time and effort.
Here's how to build a simple automation step-by-step. No coding experience required.
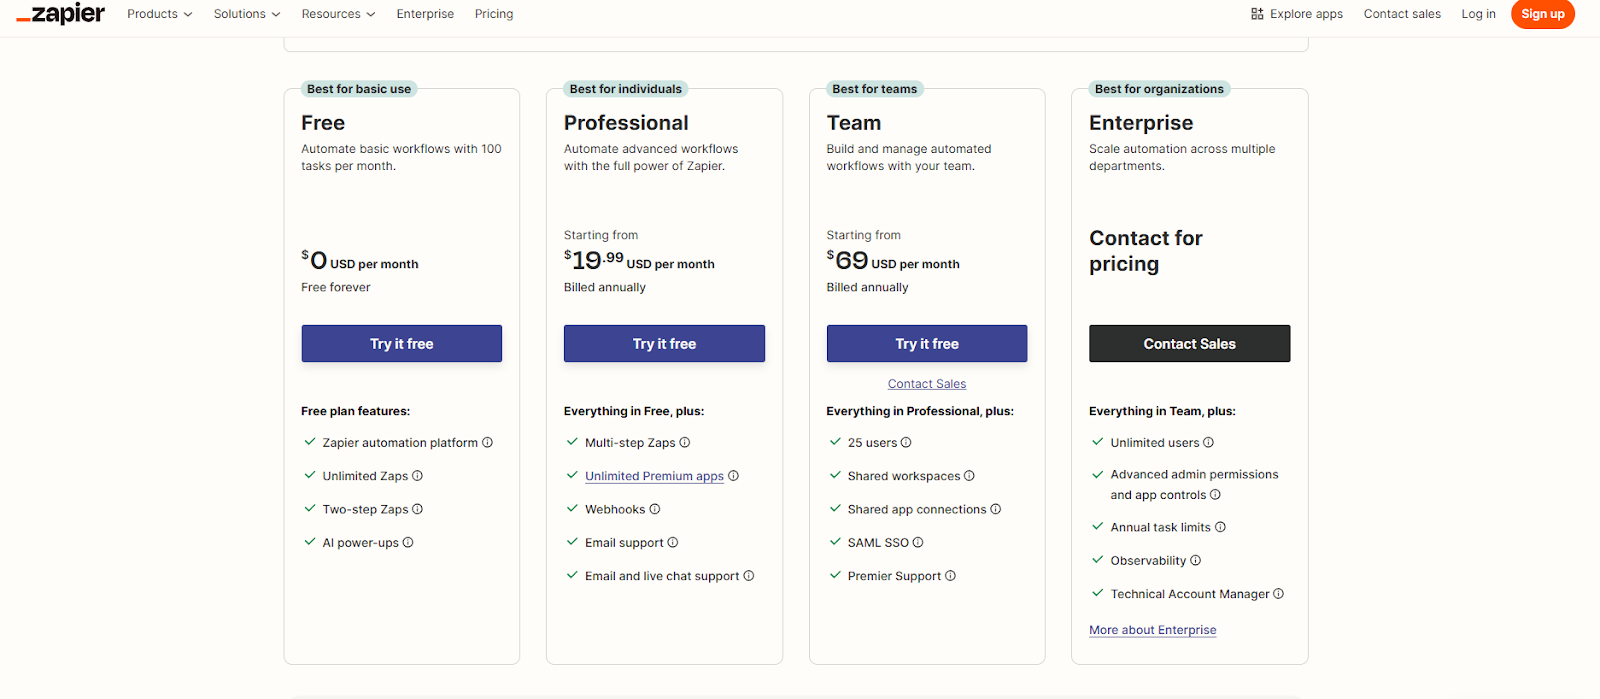
You'll need to have a Teachable Pro account (or higher) and an active Manychat Pro account to set up this automation. You can set this up with the basic Zapier plan (free), which allows up to 100 actions per month (meaning your school has up to 100 enrollments per month). If you need more than 100 actions per month, then you want to upgrade to one of Zapier's paid plans.
If you don't already have a Zapier account, create one. It only takes a couple of clicks.
Next, you'll want to set up your Manychat Pro account if you don't have one already. The process takes about 10 minutes.

Now that you have Zapier and Manychat set up, it's time to connect your Zapier to Teachable's platform.
Go to your school's dashboard on Teachable's platform and find the App Hub.
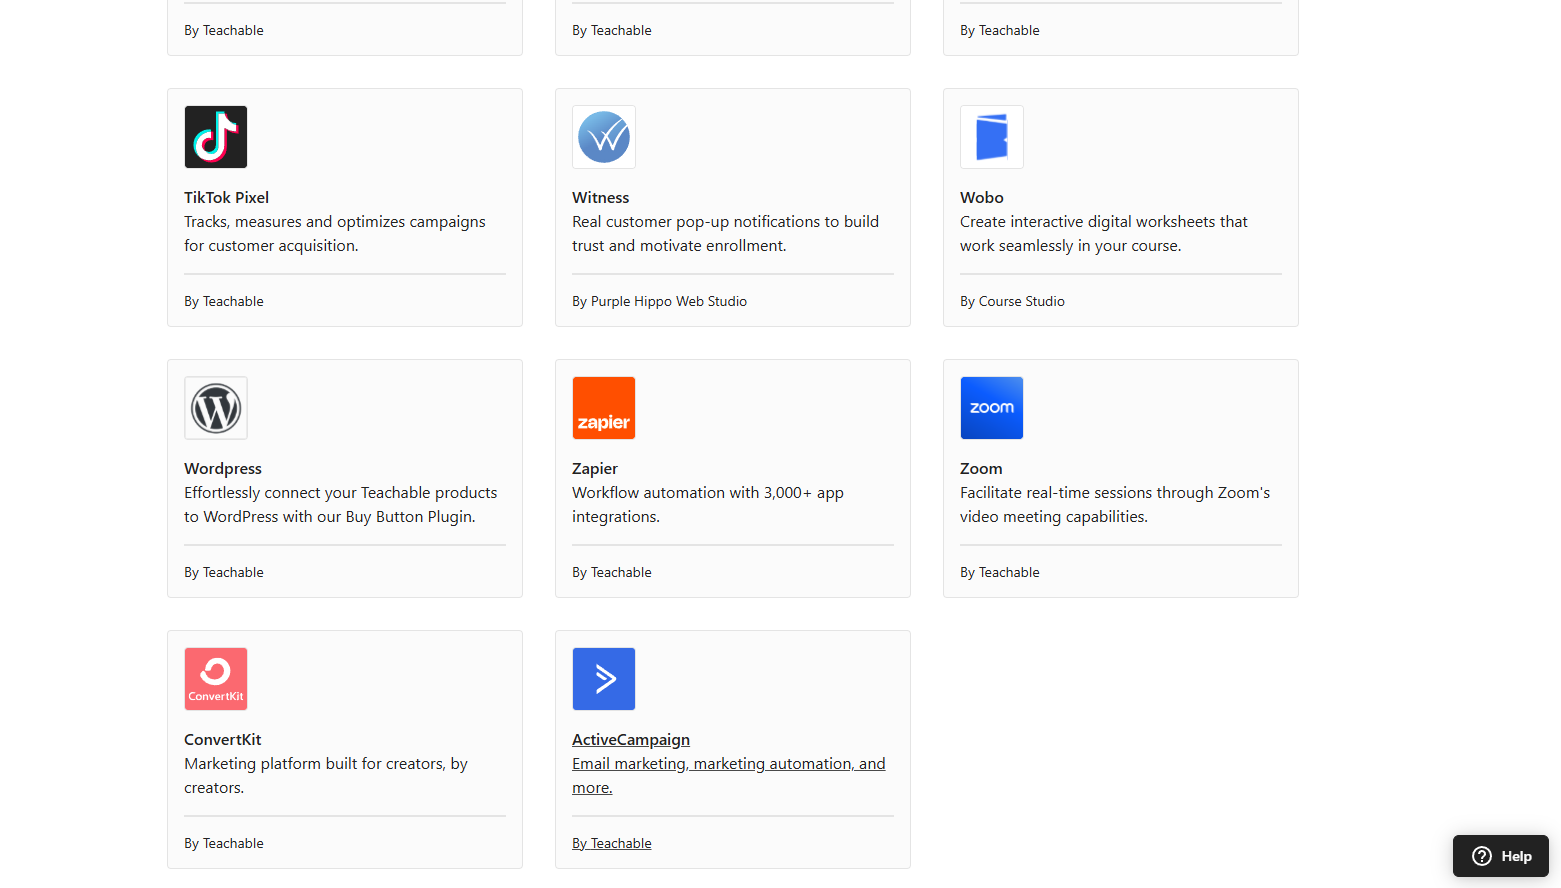
Scroll down until you find Zapier. Click the Set Up button in the top right corner of your screen.
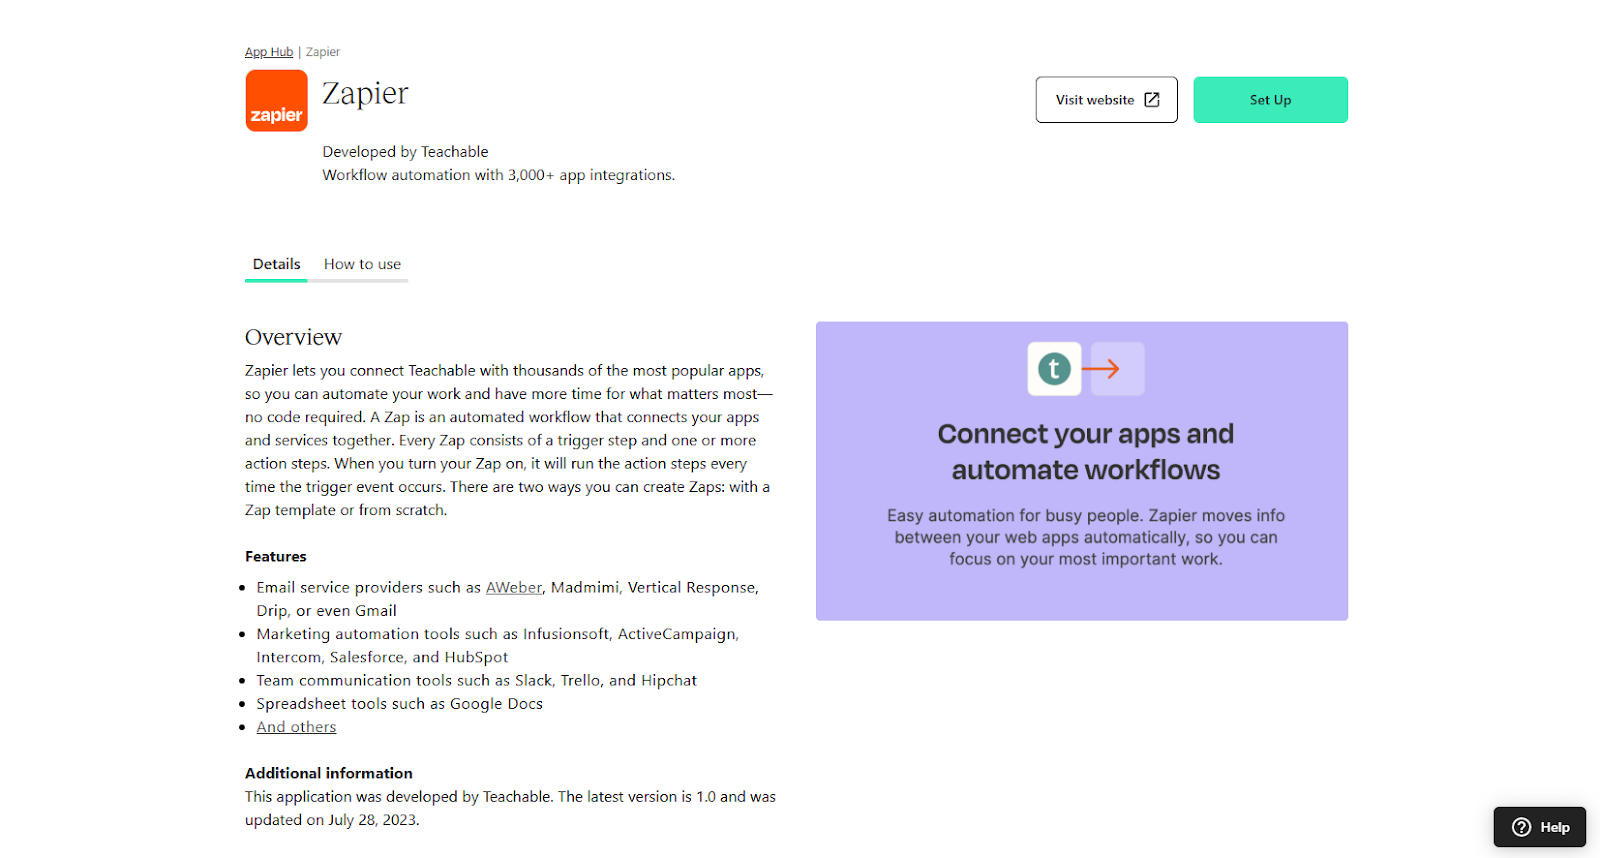
A new window will pop up. Here, click on View All to see all the integrations available through Zapier.

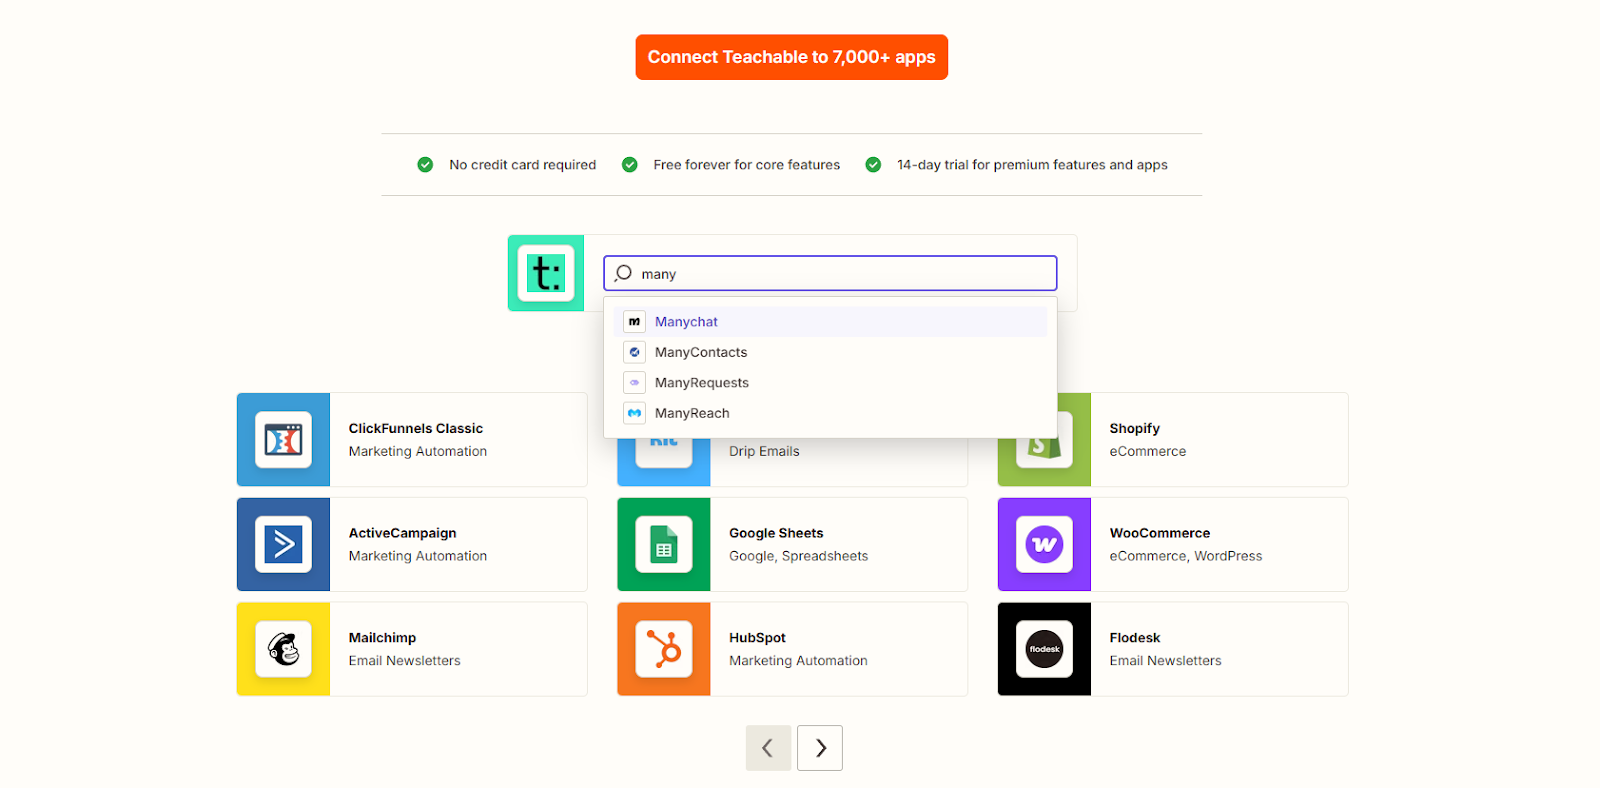
You'll be taken to the page where you can search for the Manychat app.
Another window will pop up, where you need to click the Connect These Apps button in the middle.
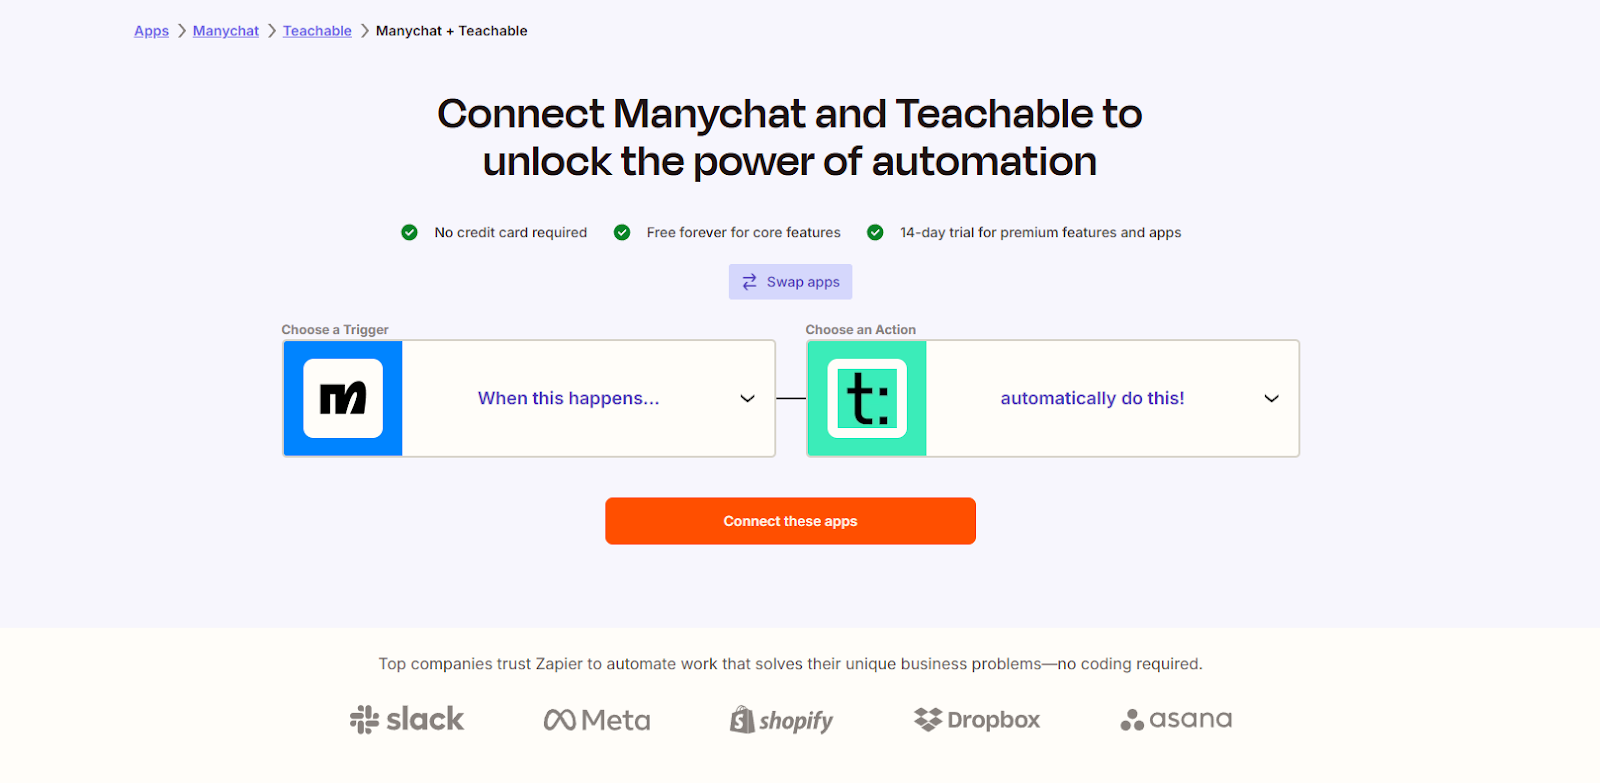
Immediately, you'll be taken to your Zapier dashboard, where you can create your Zap.
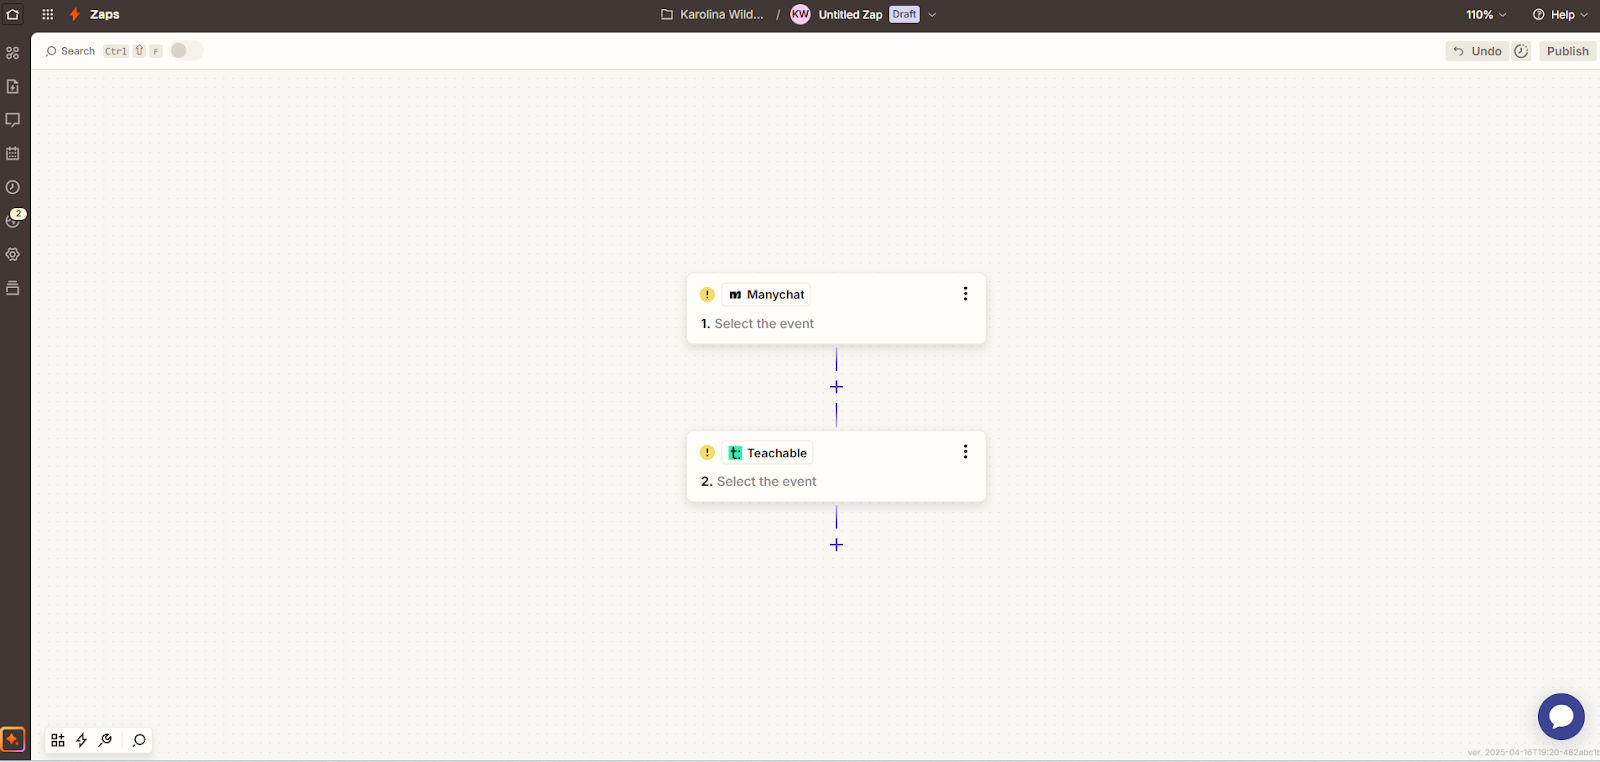
So, let's say you want to use this Teachable Manychats Zapier integration to boost student engagement. At the end of each lecture, you have a graded quiz that allows your students to test their knowledge. But that's not enough – you want to take it a step further.
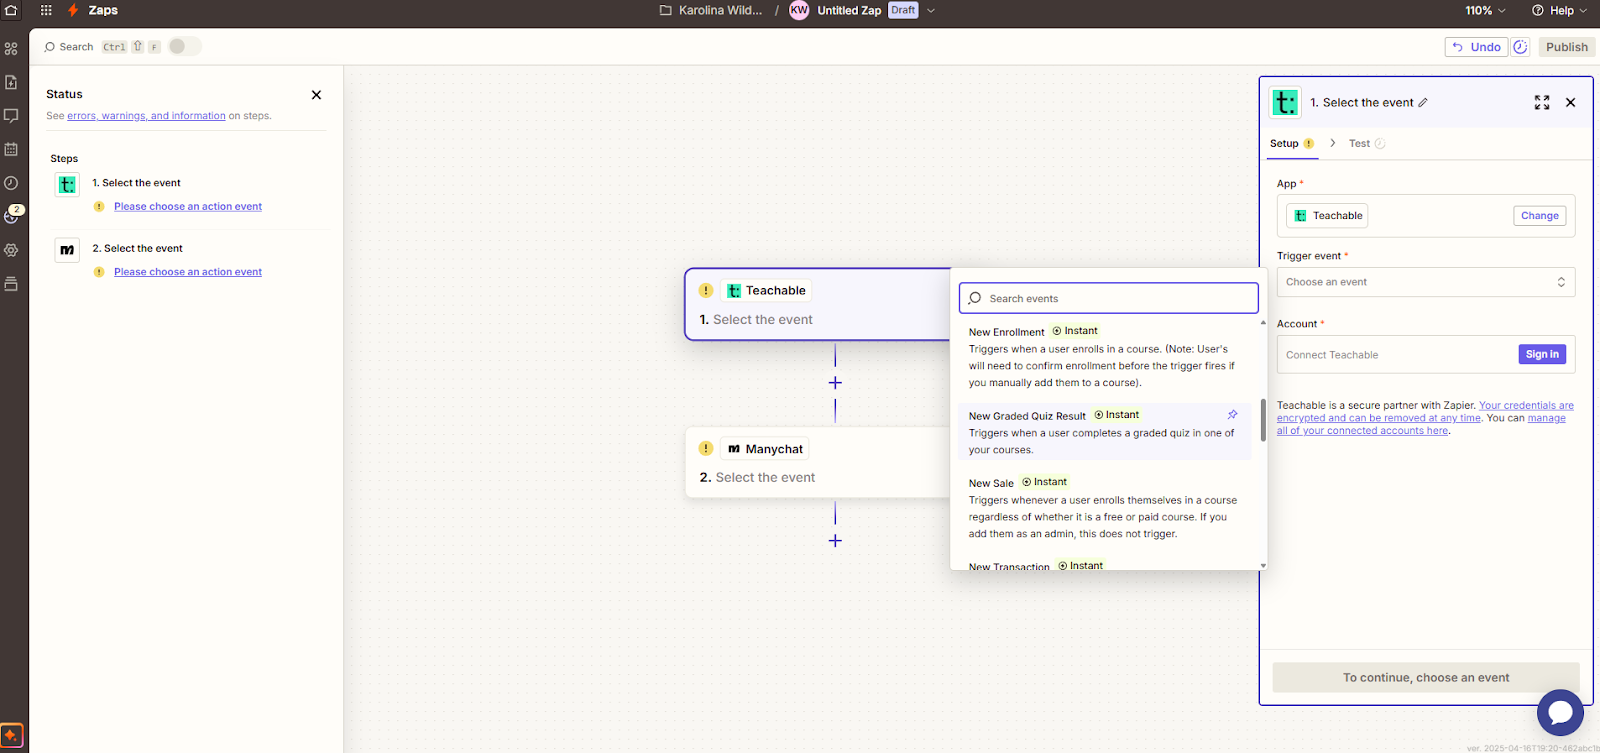
Set up the Trigger event to be a New Graded Quiz Result.
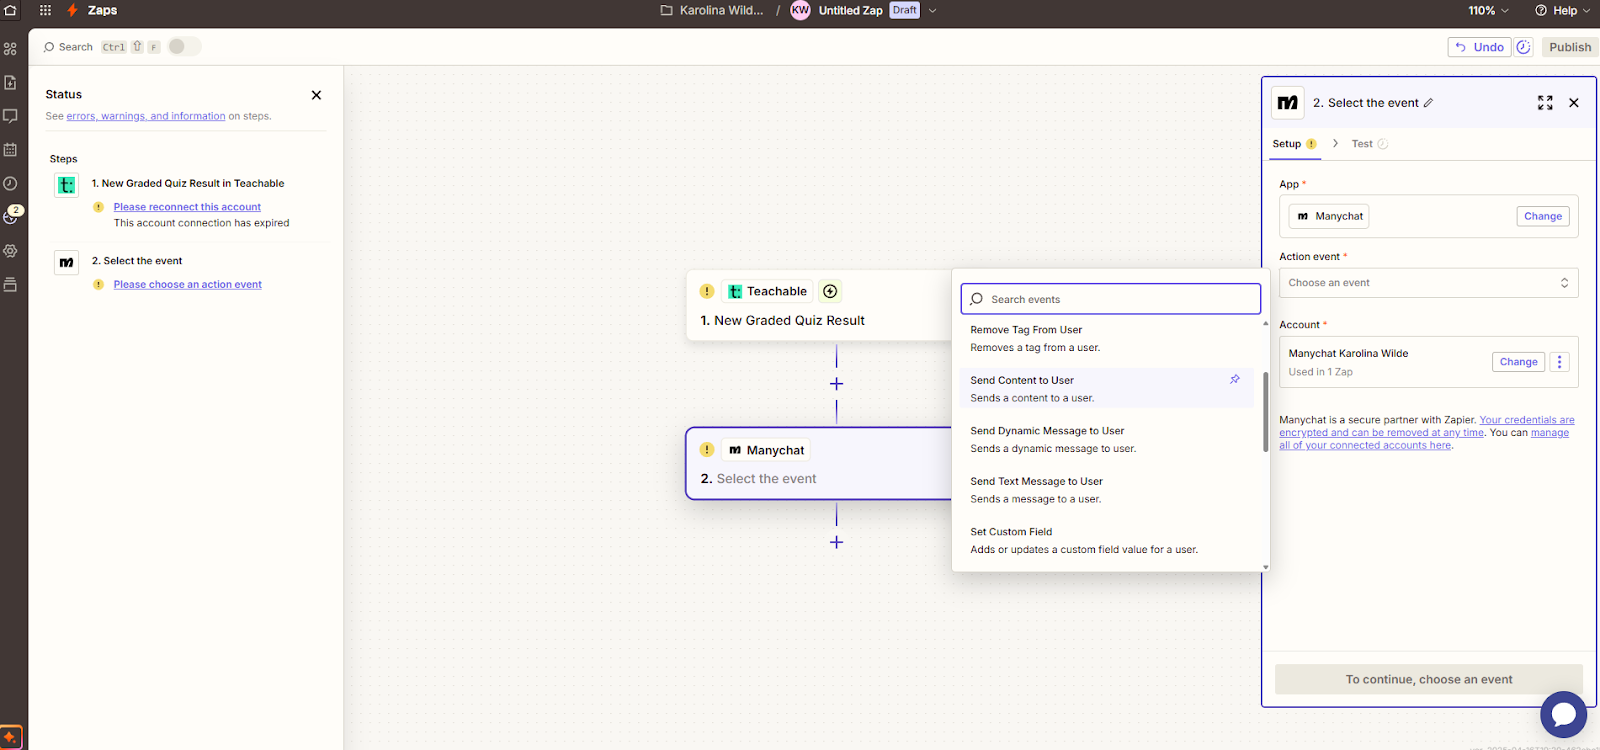
Next, you need to set up an Action that follows whenever the Trigger is activated.
So, to engage your students whenever they finish a graded quiz in your course, choose Send Content to User. This will allow you to set up a message to any students who did the quiz with content in it.
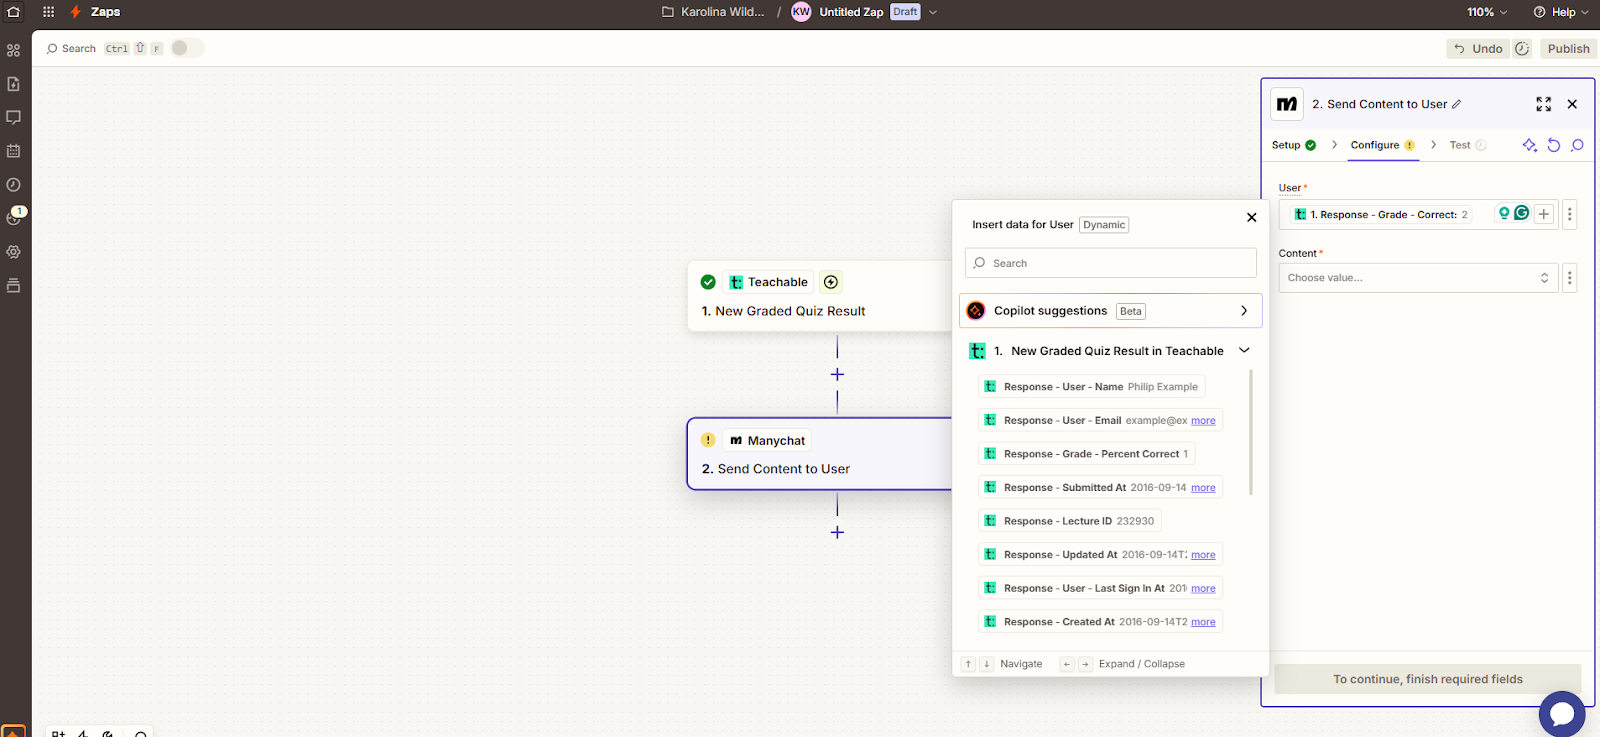
In the User field, you can choose when the student qualifies to receive a message from you. So, for example, if the student aced the quiz, you can set up to send an automated message like: "Congrats on passing the quiz! Here's the link to your next module."
Zapier allows you to test your new automation flow to ensure that every step works as intended. So, take the time to test every part of your automation to ensure a good experience for your students.
With this integration, you're not only automating tasks – you're unlocking new ways to serve your audience, close more sales, and keep your existing students engaged across different platforms. Here's how pro creators are using Manychat and Teachable to grow their businesses:
Let's say you're running a 48-hour flash sale on one of your online courses. Here's how this integration can help you optimize your sales funnel.
With the help of Manychat, you can build a Messenger or Instagram DM campaign to promote the sale – in all of your social media promo posts, invite your audience to comment or DM a word related to this flash sale.
Everyone who does it will receive an automated message from Manychat with all the information about the sale. That includes things like countdown timers, bonuses, links to the sales pages, and urgency-driven CTA's.
With the help of Zapier, you can set up an automation where when someone clicks the "Buy Now" button on your sales page and completes the purchase on Teachable, you can instantly enroll them into the course, send them a confirmation message in Messenger, or send them a text and tag them at the back end with a useful tag that will help you determine the success of your flash sale.
No one falls through the cracks with this setup. You build real-time momentum, automate delivery, and segment your students to know what to upsell to them next at a later date. The best part? You do this all without lifting a finger in real time – you only need to set up the automation once.
For high-ticket courses and cohort-based course launches, building a waitlist is key – and Manychat comes in handy here.
Manychat allows you to create a conversational opt-in flow, something along these lines: "Want to be the first to sign up for [Course Name]? Click a link here to join the exclusive waitlist."
Then, you use Manychat to nurture those people who signed up to be on the waitlist with sneak peeks, behind-the-scenes content, or limited-time offers to keep the list engaged all the way until the launch date.
Once the launch day approaches, Zapier can help you set up an automation that seamlessly organizes the students who enroll through the special link. They're automatically enrolled into the course, removed from the list for further promos on Manychat, and moved into a post-purchase flow of onboarding, next steps, and community invites.
This flow allows you to capture warm leads and turn them into excited students without messy spreadsheets or manual tagging. Students receive world-class experience, and you save time and prevent additional stress from getting everything right manually.
When you host a live webinar or Instagram Live to build a buzz around the upcoming product launch or a topic you may be testing out for a potential course, you want to capitalize on the momentum and do it fast.
Manychat allows you to capture opt-ins during the live event. You can automate a message that entices people to DM their emails to you so you can send a freebie on a topic related to them. The emails are then automatically added to your list and tagged, and people receive the freebie without you having to lift a finger.
If you have a free online course on Teachable, you want to promote it with a live event, and Zapier can help enroll every person who attends the event in your course. Manychat then sends personalized messages with login links and support details to everyone who's enrolled.
This automation lets you turn attention into action and gives you an opportunity to reward engagement with immediate value without wasting any time and missing out on the opportunity window.
Once your Zap is up and running, it's time to optimize. These pro-level tweaks help you improve performance and scale smarter:
Manual follow-ups and onboarding don't have to take up your best creative hours. Connect Teachable, Manychat, and Zapier so you can:
Yes. Zapier allows you to create multi-app workflows. You can set up automations that not only connect Teachable and Manychat but also integrate with tools like ConvertKit or Mailchimp to send follow-up emails, segment users, or deliver drip content.
You can track ROI by tagging users through Manychat, monitoring conversion events in Teachable (like enrollments), and reviewing click-throughs and interactions in your Manychat analytics dashboard. Set benchmarks such as enrollment rate, open rate, and time saved weekly to measure impact.
If a student opts out of Messenger, they won’t receive further messages via that channel. However, you can use fallback channels like SMS or email (also integrated via Zapier) to keep them in your communication loop. Always diversify channels to ensure consistent touch points.
Sign up or upgrade your Teachable plan to Professional (or higher) and set up your first automation today.